Top Picks: recommended microphones for podcasting
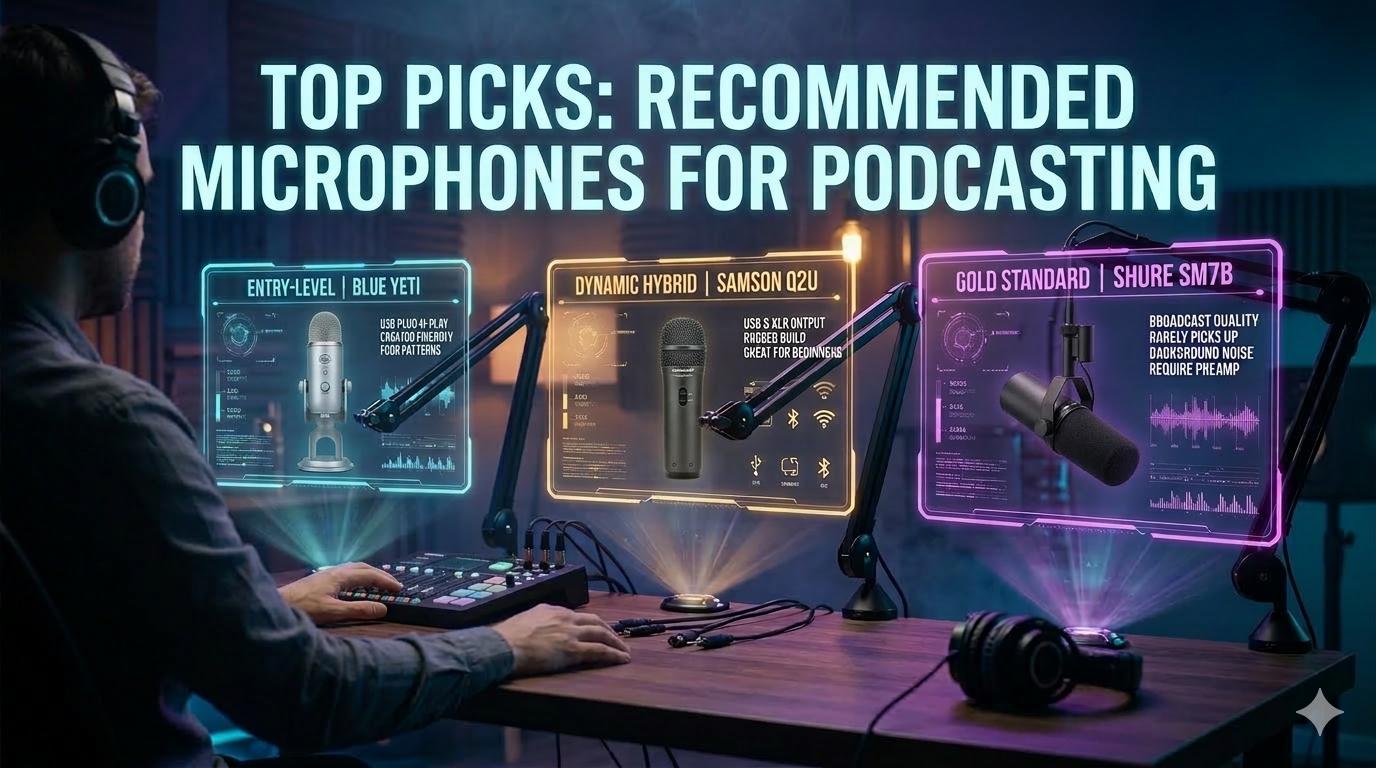
If you’re just starting out, you’ve probably heard a few names thrown around. The Blue Yeti is a crowd-favorite for its simple USB setup, the Samson Q2U gets a lot of love for being a budget-friendly hybrid (USB and XLR), and the legendary Shure SM7B is the gold standard for pro studios. The best mic for you really boils down to your budget, where you’re recording, and how much you want to tinker with the tech.
Finding Your Voice: A Guide to Podcasting Mics
Let's be blunt: your microphone is the single most important piece of gear separating a garage-band podcast from an authoritative, professional show. It's the literal bridge between your voice and your listener's ears. Great audio quality isn't just a "nice-to-have"—it's a direct driver of listener engagement and credibility, whether you're climbing the charts on Spotify or building an audience on YouTube.
In the packed podcasting arena of 2026, where listenership is set to rocket past 619.2 million people globally (Source: Statista), crystal-clear audio is non-negotiable. It’s no surprise that the Blue Yeti is a standout, used by 16.6% of podcasters. It even edges out the incredibly versatile Samson Q2U, which holds a solid 8.1% of the market (Source: The Podcast Host).
Making the Foundational Choice
Every creator, from rookie to veteran, faces one critical decision that shapes their entire recording setup: do you go with the plug-and-play simplicity of a USB microphone or the professional-grade control of an XLR microphone? Think of it like choosing between an automatic and a manual car. Both will get you where you’re going, but they offer vastly different experiences in terms of control, performance, and potential.
A USB mic is the perfect on-ramp for most podcasters. It plugs straight into your computer's USB port, handling all the complicated audio conversion internally. It just works.
An XLR mic is the industry standard. It requires a separate piece of hardware called an audio interface to connect to your computer, giving you far more control over your sound and opening the door to more advanced setups.
This choice between USB and XLR isn't about which one is "better." It's about what's right for your show right now, and where you plan to take it in the future. Starting simple is almost always the smartest move.
This guide will demystify the tech, clear up the confusion, and give you a framework for choosing the right mic for your specific goals. You’ll also see just how much audio quality matters when you compare the demands of podcasts vs YouTube.
But first, let’s get a quick lay of the land.
Top Recommended Podcast Microphones of 2026 At a Glance
Here is a high-level comparison of our top recommended microphones. This table is designed to help you quickly identify the best option based on your unique podcasting needs and style.
Each of these microphones is a leader in its class, but the "best" one is ultimately the one that fits your show's format, your recording space, and your budget. Now, let’s dive deeper into what makes these mics tick.
The First Big Decision: USB vs. XLR Microphones
This is the first major fork in the road every new podcaster faces. Your choice between a USB and an XLR microphone will shape your budget, your workflow, and how easily you can scale up your show down the line. Getting this right is your first step toward great sound.
Think of a USB microphone as an all-in-one solution. It’s got all the tech baked right in—the microphone capsule, the preamp, and the digital converter. You just plug it straight into your computer, select it as your audio input, and you’re ready to hit record. It’s that simple.
The Simplicity of USB Microphones
The beauty of a USB mic is its plug-and-play nature. For solo podcasters, beginners, or anyone who needs to send a mic to a remote guest, they are often the perfect choice. Even seasoned pros value this simplicity; after recording over 500 episodes, one expert shared that reliability is everything when you're trying to avoid a technical meltdown during an interview.
By getting rid of extra hardware, you have fewer things that can go wrong. This makes them a fantastic fit for:
- Beginners: The learning curve is practically non-existent, so you can focus on creating great content, not fighting with your gear.
- Solo Podcasters: If you’re the only person talking, a single, straightforward USB connection is all you’ll ever need.
- Remote Guests: Shipping a simple USB mic to a guest is the easiest way to ensure they sound fantastic without a complicated setup on their end.
The trade-off for this convenience is scalability. Most computers will only recognize one USB microphone at a time, making them a poor choice for in-person, multi-host recordings. And that’s where the professional standard, XLR, enters the picture.
“Every extra cable or piece of gear introduces another point of failure. There's nothing worse than messing up a recording because your equipment failed. Always look for reliable, time-tested gear.” – A lesson shared by Alban Brooke, Head of Marketing at Buzzsprout.
The Power and Flexibility of XLR Microphones
An XLR microphone is part of a more professional, modular system—think of it like a high-end DSLR camera. The mic itself is a specialized tool that just captures analog sound. To get that sound into your computer, you need a separate device called an audio interface.
The audio interface is a small box that acts as the brain of your recording setup. It handles several critical jobs:
- It supplies the special "phantom power" that many professional mics need to operate.
- It converts the mic's analog sound waves into a digital signal your computer can process.
- It lets you plug in multiple microphones for co-hosts or in-person guests.
- It gives you physical knobs for hands-on, precise control over your volume levels.
This modular approach is the industry standard for a reason. Audio experts agree that while a USB mic is a great starting point, an XLR setup gives you a much higher ceiling for quality and far more flexibility as you grow. This is the path for creators who want true broadcast-quality sound and the ability to expand their studio.
Key Advantages of an XLR Setup:
- Superior Sound Quality: You can mix and match high-end microphones with premium interfaces to achieve absolutely pristine audio.
- Scalability: Need to add a co-host? Just get an interface with more inputs. It’s that easy to grow from a solo show to a full panel.
- Durability and Repairability: The three-pin XLR cable is a tough, locking connector that won’t accidentally get yanked out. If one component fails—the mic, the cable, or the interface—you only have to replace that one part, not your entire setup.
- Greater Control: Interfaces like the RODECaster series give you a tactile mixing board, letting you adjust levels on the fly with real knobs and faders.
Ultimately, the choice between USB and XLR isn’t about which one is "better" but which one is better for you, right now. It’s a classic trade-off: convenience and simplicity versus professional control and scalability. The path you choose today will set the stage for how your podcast sounds and grows tomorrow.
Dynamic or Condenser: What Suits Your Recording Space
Okay, you’ve nailed down how you'll connect your mic—USB for plug-and-play simplicity or XLR for hands-on control. The next choice you make is just as critical, and it’s all about how the microphone actually hears the world.
Every podcast mic belongs to one of two camps: dynamic or condenser. Getting this right isn't about which is technically "better," but which is the right tool for your specific recording space. This one decision can make or break your sound quality from day one.
Dynamic Microphones: The Spotlight for Your Voice
Think of a dynamic microphone as a tight, focused spotlight. Its job is to capture whatever is directly in front of it and aggressively ignore everything else. This makes it an absolute champion at isolating your voice from distracting background noise.
Let's be real—most of us aren't recording in a soundproofed studio. We're in a home office, a spare bedroom, or a corner of the living room. These spaces are filled with ambient sounds:
- The low hum of a computer fan or air conditioner
- Echoes bouncing off hard surfaces and bare walls
- Distant traffic, a barking dog, or kids playing
- The click of your own keyboard
A dynamic mic is built for these imperfect environments. It's intentionally less sensitive, so it focuses on you and delivers that classic, tight, broadcast-ready sound you associate with radio. This is exactly why they are the go-to for live shows and untreated rooms.
Condenser Microphones: The Floodlight for Detail
If a dynamic is a spotlight, then a condenser microphone is a wide, brilliant floodlight. It's engineered for extreme sensitivity, designed to capture every tiny nuance and subtle detail in your voice. When you hear a vocal track that sounds incredibly crisp, airy, and rich, you're almost certainly hearing a condenser.
But that incredible detail is a double-edged sword. In a whisper-quiet, acoustically treated room—like a professional vocal booth or even a walk-in closet packed with clothes—a condenser will make your voice sound phenomenal.
In a normal room, however, that same sensitivity becomes a liability. It will pick up the slight echo from the far wall, the refrigerator humming down the hall, and the birds chirping outside. A condenser hears everything, which can quickly turn your recording into a noisy, amateur-sounding mess.
Key Takeaway: Your recording space is the boss. A simple dynamic mic in a noisy room will always sound more professional than a premium condenser mic in that same room. Master your environment first.
Making the Right Choice for Your Show
So, which one is for you? It all comes down to being honest about your recording reality.
Go with a DYNAMIC microphone if:
- You record in a typical, untreated room (office, bedroom, etc.).
- You have ambient noise you can't eliminate, like HVAC, fans, or street noise.
- You'll have multiple guests in the same room (it reduces "mic bleed" between speakers).
- You want that classic, focused "radio voice" sound.
There's a reason dynamic mics are the workhorses of the podcasting world, commanding a massive $1.20 billion market in 2024. That figure is projected to hit $2.09 billion by 2033, a testament to their ruggedness and unmatched performance in real-world settings. You can review the full market analysis of these podcasting powerhouses to see why they dominate.
Go with a CONDENSER microphone if:
- You have a dedicated, acoustically treated, and very quiet space.
- Your top priority is capturing the most detailed, nuanced, and "airy" vocal sound.
- You are recording a solo host and have complete control over the environment.
For the vast majority of podcasters—especially when you're just starting out—a dynamic microphone is the safer, smarter, and more practical choice. It gives you a professional sound with far less hassle, making it one of the most recommended microphones for podcasting in nearly every scenario.
Recommended Microphones for Every Podcast Scenario
Alright, we’ve covered the technical side of things. Now let's put that knowledge to work and find the right microphone for you.
The truth is, there’s no single "best" podcasting mic. The best microphone is the one that fits your recording space, your show's format, and your budget. It’s all about matching the tool to the job.
Here, we’ll break down our top picks for the most common podcasting setups. We’ll cover everything from dead-simple USB mics for solo creators to professional XLR setups for brands building an in-house studio.
For Solo Creators and Beginners
If you’re launching your first show or just need great audio with zero fuss, a high-quality USB microphone is the way to go. These are plug-and-play powerhouses that give you excellent sound quality without needing a separate audio interface.
- Top Pick: Blue Yeti. There's a reason you see the Blue Yeti everywhere—it’s the king of beginner mics. Its killer feature is the switchable polar patterns, which means you can use it for solo recording (Cardioid), an in-person interview (Bidirectional), or even a small group discussion (Omnidirectional) all with one mic.
- Why it shines: The Yeti is incredibly versatile and sounds fantastic right out of the box. For anyone wanting to experiment with different show formats without buying a bunch of gear, it's the perfect starting point.
The most important thing is to start. A simple, reliable setup will always be better than a complex, expensive one that you're too intimidated to use. Focus on consistency and content quality first, and your gear can evolve with your show.
Stuck between a dynamic or condenser mic? This decision tree makes it simple by focusing on one key factor: your recording environment.

As the guide shows, it really boils down to this: dynamic mics are brilliant at rejecting background noise in normal rooms, while condenser mics capture incredible detail in quiet, sound-treated spaces.
For Ambitious Creators Ready to Scale
When you're ready to level up your audio game—especially if you're planning multi-guest shows or a video podcast—it's time to embrace the industry standard: an XLR dynamic microphone. Hooked up to an audio interface, this setup gives you far more control, better sound, and the ability to grow.
Top Picks for XLR Setups:
- The Industry Workhorse: Shure SM7B. From Joe Rogan's studio to legendary recording artists, this is the broadcast mic. The Shure SM7B delivers that warm, rich vocal tone you hear on top podcasts and is famous for killing background noise, making you sound amazing even if your room isn't perfect.
- The Focused Contender: Rode Procaster. Another phenomenal broadcast dynamic mic, the Rode Procaster has a tight pickup pattern that does a fantastic job of isolating your voice from everything else. With a built-in pop filter and a design tailored for spoken word, it’s a podcaster’s dream.
To make the choice even clearer, we’ve put together a quick guide based on common podcasting goals and budgets.
Recommended Mics by Use Case and Budget
This table breaks down our recommendations to help you find the perfect microphone based on your show style, technical needs, and what you're looking to spend.
Choosing from this list gives you a proven winner, ensuring your investment pays off with professional-sounding audio that fits your specific needs.
The Best of Both Worlds: USB/XLR Hybrids
What if you want the ease of USB today but the option to go pro with XLR tomorrow? Get a hybrid mic. These brilliant devices have both connections built right in, giving you a perfect upgrade path.
This flexibility is becoming more important as videocasts take over. For podcasters moving to video, a USB/XLR combo mic like the Samson Q2U is a total game-changer. It's no surprise it's the second most popular mic, capturing 8.1% of the market, or that combo interfaces have reached 19.7% adoption (Source: The Podcast Host).
This trend is part of a massive boom in the podcast equipment space, which was valued at $3.7 billion and is projected to more than double to $7.2 billion by 2033. You can explore more data on the rapid growth of podcasting gear to see just how fast things are moving.
By understanding these different scenarios, you can pick a microphone that not only works for you right now but also grows with your show's ambitions.
Essential Accessories to Maximize Your Sound Quality
Picking one of the recommended microphones for podcasting is a great start, but the mic is only one piece of the puzzle. Think of it like this: you can buy a world-class camera, but if your lighting is terrible, the photos will still look amateur. To get that polished, professional sound your listeners expect, a few key accessories are non-negotiable.
These aren't just fancy add-ons. They're fundamental tools for controlling your audio and stopping common problems dead in their tracks. Investing in the right support system is just as crucial as the mic itself.
Taming Your Plosives with a Pop Filter
Ever notice that loud, bassy "thump" on a recording when someone says words with a hard "p" or "b"? Those are called plosives. They’re aggressive bursts of air that slam into the microphone’s diaphragm, creating a distorted pop that’s impossible for listeners to ignore.
A pop filter is a simple screen that you place between your mouth and the mic. Its only job is to break up that blast of air before it can wreck your take. It’s a cheap and easy fix that makes a massive difference. Many starter mics, like the Samson Q2U, even include a basic foam windscreen that does a similar job.
Getting Perfect Mic Placement with a Boom Arm
While most mics come with a little desk stand, a boom arm is one of the most powerful upgrades you can make. This is an adjustable, spring-loaded arm that clamps to your desk, allowing you to position your mic perfectly in the air.
This solves two huge problems at once:
- Optimal Positioning: It lets you place the mic at the ideal distance from your mouth (usually 4-6 inches) without having to hunch over. This single change will give you a richer, more consistent vocal tone.
- Vibration Isolation: A boom arm lifts the mic completely off your desk. That means no more rumbles from typing, bumping the table, or tapping your fingers. Those low-frequency noises can ruin a recording, and a boom arm gets rid of them entirely.
For video podcasters, low-profile arms like the OC White Ultima or Rode PSA1+ are fantastic because they keep the mic perfectly placed without blocking the camera shot.
A great microphone in a poor position will always sound worse than an average microphone in the perfect position. Proper placement is free, and it’s the most effective way to improve your audio quality immediately.
Protecting Your Audio with a Shock Mount
Think of a shock mount as a suspension system for your microphone. It's a cradle with elastic bands that isolates the mic from any physical contact with the stand. It’s your final line of defense against handling noise.
Even with a good boom arm, an accidental bump to the desk or the arm itself can send a vibration straight to the mic. A shock mount absorbs that jolt, preventing a loud "thump" from ending up in your final audio. If you tend to move around while you talk, it’s an essential piece of insurance for your recordings.
For those wanting to understand the full audio chain, our guide on choosing an audio interface for podcasting is the perfect next read.
Mastering Your Mic Technique
Beyond the gear, how you use the mic is just as important. This is called mic technique. One of the best tricks is to speak slightly across the top of the microphone, not directly into it.
This simple adjustment gives you two major benefits:
- It naturally softens the impact of plosives, adding another layer of protection.
- It can create a warmer, richer vocal tone with more bass presence—the classic "radio voice" effect.
By combining the right accessories with smart technique, you create an environment where your microphone can truly shine. This is how you guarantee your audio is clean, consistent, and professional right from the start.
Frequently Asked Questions About Podcast Mics
Even with a solid guide, picking your first (or next) podcasting mic can leave you with a few nagging questions. We've gathered the most common ones here to clear up any final confusion and help you choose with confidence.
Do I Really Need an Expensive Microphone to Start a Podcast?
Absolutely not. You can get fantastic, broadcast-quality audio from budget-friendly USB mics like the Samson Q2U or the Audio-Technica AT2020. These microphones are a huge step up from your computer’s built-in mic and are more than enough to produce a professional-sounding show.
When you're starting out, consistency and great content matter way more than expensive gear. You can always upgrade to a more advanced XLR setup once your podcast starts to grow and bring in some revenue. The key is just to start.
Remember, a basic mic in a good recording environment will always sound better than a high-end mic in a noisy, untreated room. Your space and your mic technique have a massive impact on sound quality—and improving them costs nothing.
What Is a Polar Pattern and Why Does It Matter?
A polar pattern is simply the area around a microphone where it’s most sensitive to sound. Think of it as the mic’s “hearing zone.” For virtually all podcasters, the Cardioid pattern is what you want.
A cardioid mic picks up sound directly in front of it while rejecting noise from the sides and back. This is incredibly helpful for a few reasons:
- It isolates your voice from room echo and reverb.
- It cuts down on background noise like keyboard tapping or a whirring fan.
- For multi-person shows, it reduces "bleed" from the other speakers' voices.
Understanding this helps you pick a mic that works with your recording space, not against it. It's also why almost every mic we recommend for podcasting uses this focused pattern. For a deeper dive into audio specifics, you can check out our guide on understanding the audio frequency and EQ chart.
Can I Use the Same Microphone for a Video Podcast?
Yes, and you absolutely should. The mics most recommended for audio-only podcasts are the exact same ones used in professional video podcasts. You'll see mics like the Shure SM7B or Rode Procaster on-camera in tons of high-production shows.
Viewers are far more forgiving of so-so video quality than they are of bad audio. Investing in a great podcasting microphone is one of the smartest moves you can make, ensuring your content sounds polished and professional, whether it’s audio-only or on video.
Ready to create a high-quality video podcast without the production headaches? micDrop provides an end-to-end service, pairing you with a dedicated producer to handle everything from remote recording and editing to publishing. Skip the gear anxiety and focus on your content by visiting https://www.micdrop.cc.


