Audio Interface for Podcasting: Your Essential Setup Guide
If you're getting serious about your podcast, you’ll eventually hit a wall with a simple USB microphone. To take your sound to the next level, you need a way to connect a professional-grade microphone to your computer.
That's where an audio interface for podcasting comes in. Think of it as the crucial bridge that translates your voice from a high-end mic into a pristine digital signal your computer can actually use.
What Is an Audio Interface and Why Do You Need One
For anyone committed to top-tier sound quality, an audio interface is a non-negotiable piece of kit. While a USB mic is convenient because it has a tiny interface built-in, that convenience comes at the cost of quality.
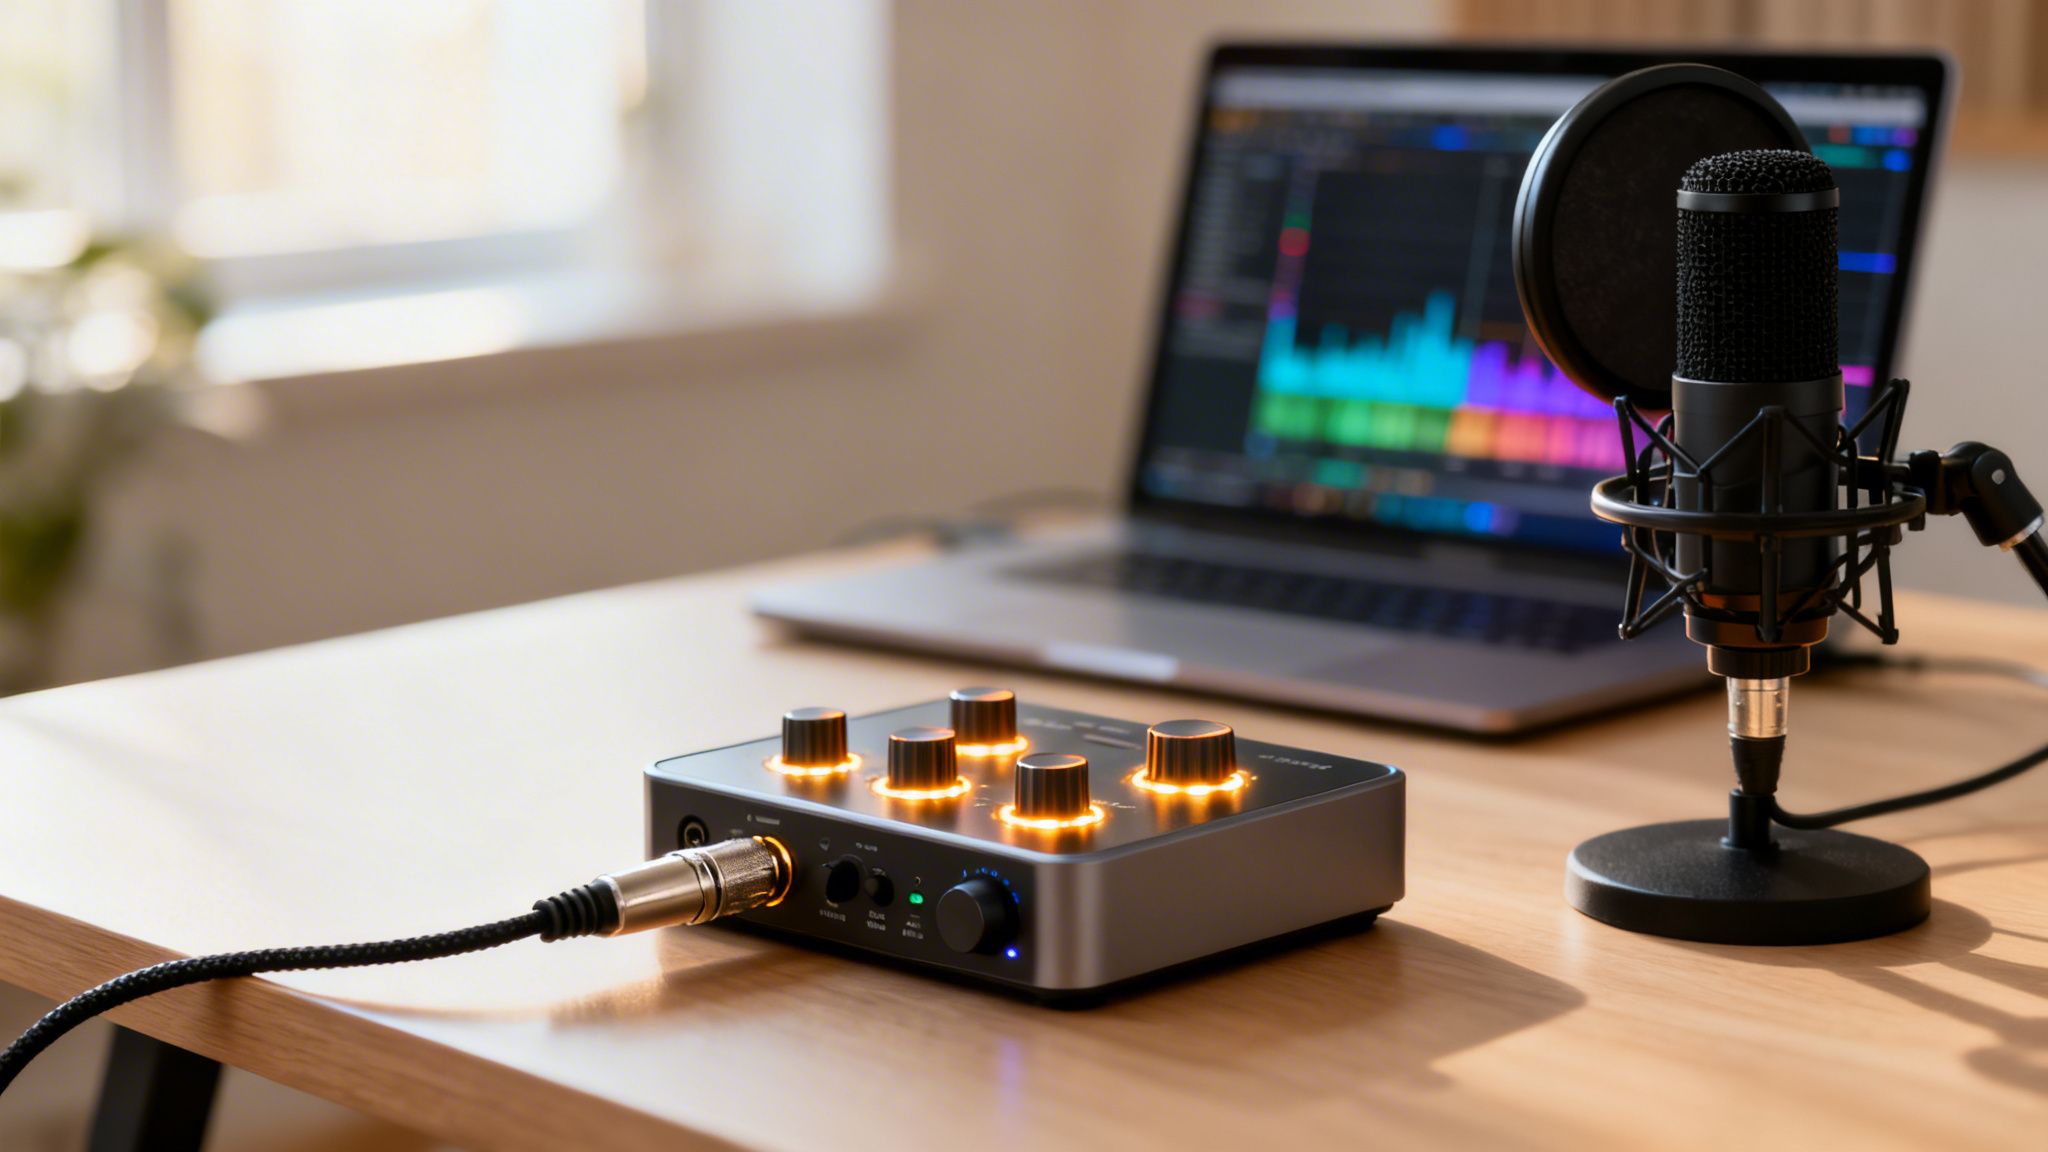
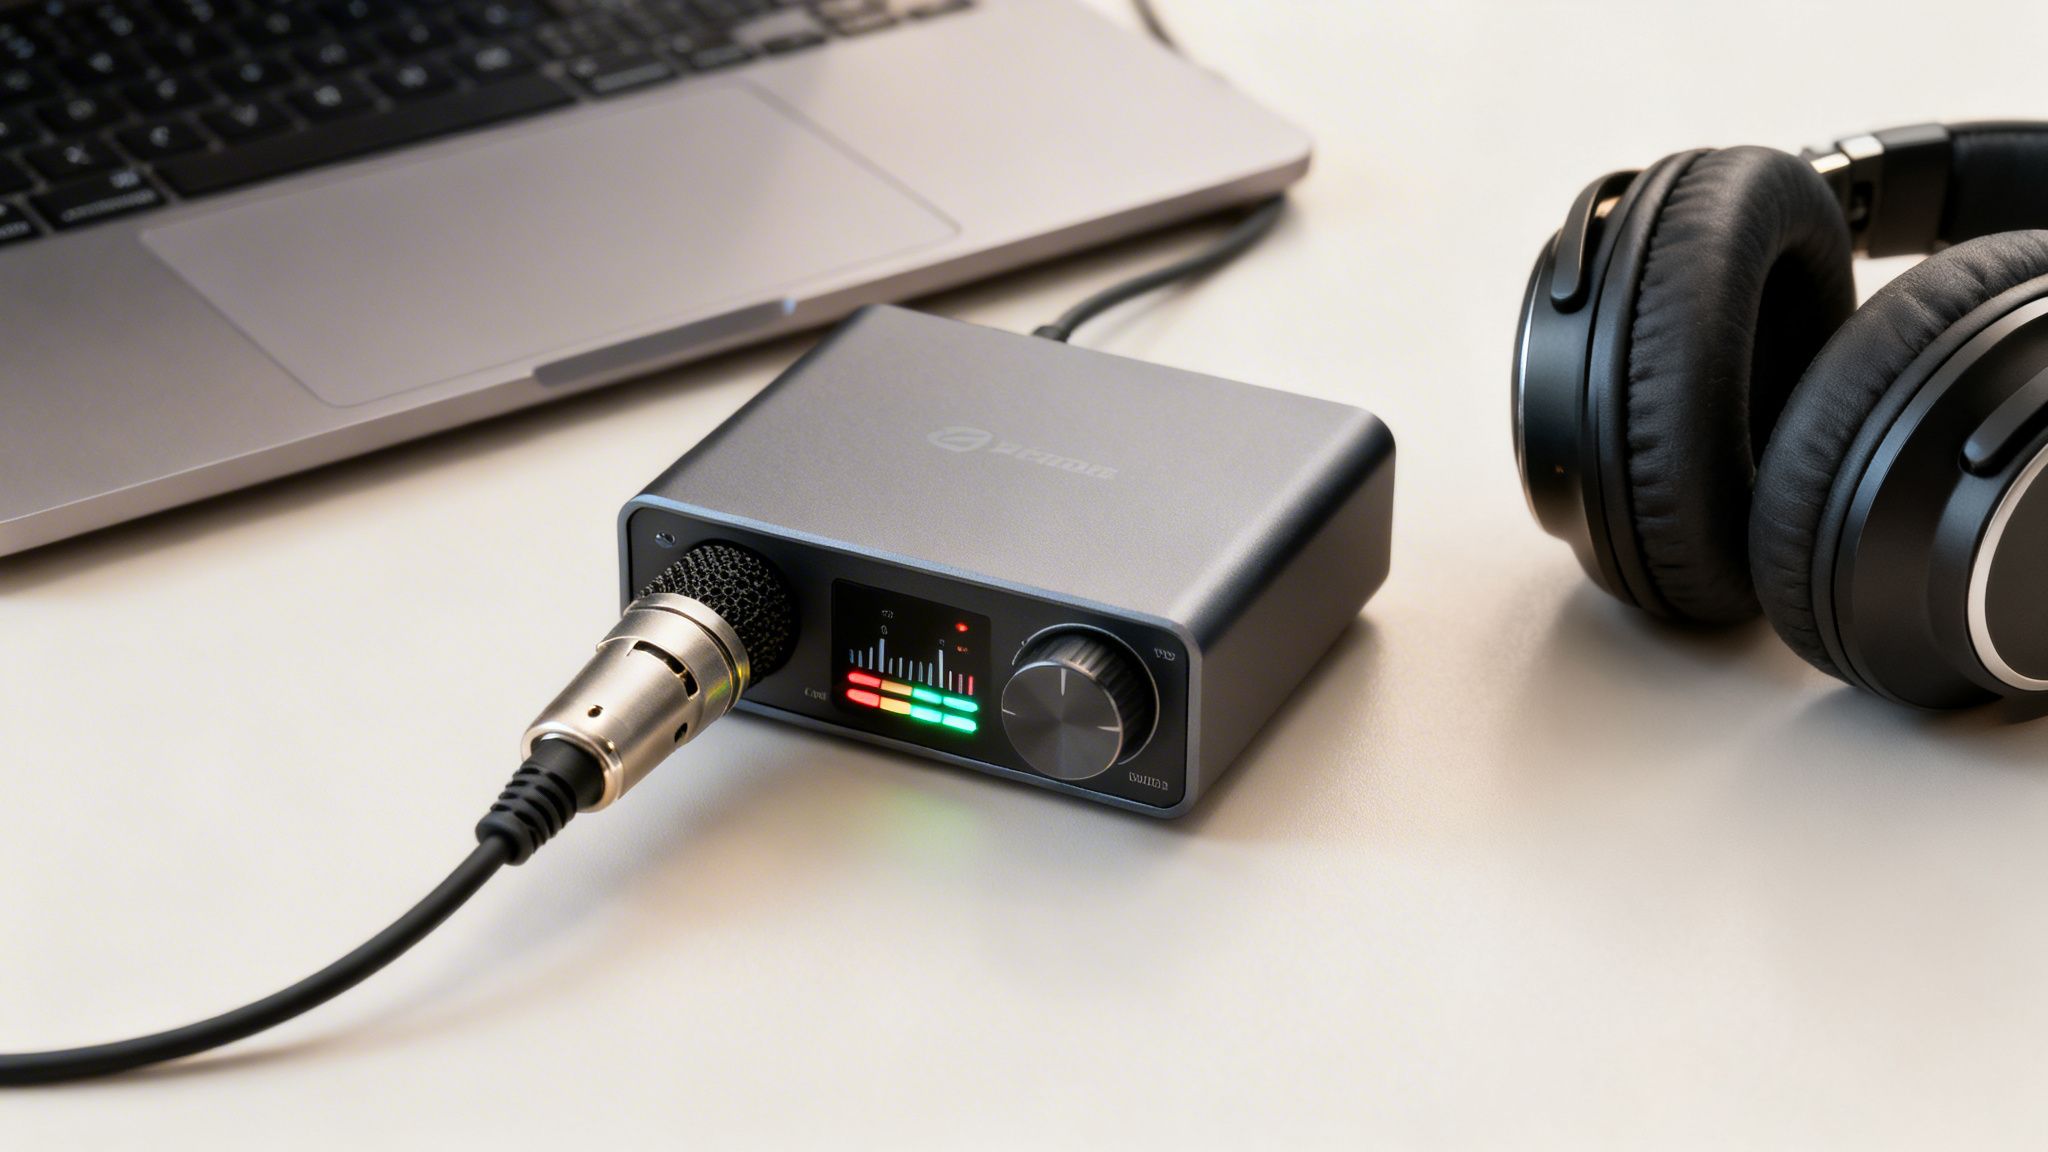
An external audio interface is a dedicated piece of hardware that unlocks a whole new world of audio fidelity and control. It’s a small box that connects to your computer (usually via USB) and gives you the proper inputs for professional XLR microphones.
Elevating Your Audio Quality
The main job of an interface is to convert the analog signal from your microphone into a digital one. This is handled by a component called an Analog-to-Digital Converter (ADC), and the ones in a dedicated interface are vastly superior to what you’ll find in a computer’s sound card or a USB mic.
A better converter means a cleaner, richer, and more detailed recording. The interface also has high-quality preamplifiers (preamps) that boost your mic’s signal to a usable level without adding that annoying hiss or background noise. This "clean gain" is the secret sauce behind that professional, broadcast-ready sound.
For many podcasters, investing in an audio interface is the single most impactful upgrade they can make. It’s the gateway to using professional XLR microphones, which offer far greater sound quality and versatility.
The Power of Control and Flexibility
An interface isn't just about sound quality; it gives you hands-on control over your recording.
- Actionable Insight: Start with a two-channel interface even if you're a solo podcaster. The small extra cost is an investment in future-proofing your show, allowing you to easily add a co-host or guest without needing to buy new hardware.
- Multi-Microphone Recording: Most interfaces have at least two inputs. This lets you record yourself and an in-person guest on separate tracks—a must-have for editing each person’s audio independently.
- Zero-Latency Monitoring: This is a game-changer. It lets you hear your own voice in your headphones in real-time, with no distracting echo or delay.
- Phantom Power: Many high-end condenser mics need a small electrical charge to work, known as +48V phantom power. Interfaces provide this with the simple push of a button.
The demand for this kind of professional gear is growing fast. The global audio interfaces market, valued at USD 285 million in 2025, is projected to hit USD 612 million by 2034. This surge is directly tied to the explosion in podcasting. You can learn more by checking out our guide on the podcast market explosion.
Do You Need an Audio Interface? A Quick Guide
Feeling unsure if an audio interface is the right move for you? This table breaks down the decision based on your podcasting goals.
Ultimately, if you're aiming for a polished, professional show or plan to host guests in person, an audio interface is an essential investment that pays for itself in quality and control.
Decoding the Must-Have Features of a Podcasting Audio Interface

Alright, you know what an audio interface does. Now it’s time to get into the details—the specific features that separate a decent audio interface for podcasting from a truly great one. Picking the right box is all about matching its specs to what you actually need to record.
The spec sheet on these devices can look pretty intimidating, but don't get overwhelmed. You only need to focus on a few key things to cut through the noise and make a smart investment. These are the features that will directly impact your workflow, sound quality, and the overall vibe of your show.
Inputs and Channels: Your Foundation for Growth
The most basic feature is the number of inputs. This simply dictates how many mics you can plug in and record at the same time. If you’re a solo host, a single-input interface gets the job done.
But if you ever plan on having a guest in the room, a two-channel interface is the absolute minimum. You need to record each person on a separate audio track—this is non-negotiable for editing. When each mic has its own channel, you can adjust one person's volume, edit out a cough, or apply effects without messing up the other person's audio.
Here's a simple breakdown:
- 1 Channel: Perfect for the solo narrator or a one-person show.
- 2 Channels: The gold standard for interviews or co-hosted podcasts.
- 4+ Channels: What you'll need for roundtable discussions with multiple guests.
Starting with at least two channels is a smart move that gives you room to grow. An interface like the popular Focusrite Scarlett 2i2 is a classic for a reason—it offers two solid inputs, making it a flexible and future-proof starting point for most podcasters.
The Power of High-Quality Preamps
Tucked inside every input is a preamplifier, or "preamp." Its job is to take the very quiet signal from your XLR microphone and boost it to a strong, clean, usable level. We call this process applying gain. The quality of your preamps is one of the single most important factors for getting clean, professional-sounding audio.
Cheap preamps are notorious for introducing a background hiss or hum as you increase the gain, which pollutes your recording from the start. High-quality preamps, on the other hand, provide what we call "clean gain"—they can boost your mic’s signal significantly without adding any of that unwanted noise.
A great preamp is the secret sauce behind that rich, broadcast-quality sound you hear on top podcasts. It makes your voice sound clear and present while the background stays dead silent.
Essential Features You Cannot Ignore
Beyond inputs and preamps, a few other features are practically non-negotiable for a smooth podcasting workflow. These solve common recording headaches and give you the control you need to produce a polished show.
Phantom Power (+48V)
Many of the best podcasting mics are "condenser" mics, and they need a little bit of electricity to work. This is called phantom power. Nearly every modern interface has a button labeled "+48V" to provide it, but you absolutely have to double-check this before buying. If you're eyeing a great condenser mic like the Audio-Technica AT2020, this feature is a must.
Direct Monitoring
Ever tried talking on a call with a bad echo of your own voice? It's impossible to focus. That delay is called latency, and it happens when audio travels from your mic, into the computer, and back to your headphones. Direct monitoring is the cure. This feature sends your mic's signal straight to your headphones before it even hits the computer, letting you hear yourself perfectly in real-time with zero delay. Trust me, you want this.
Connectivity Type
How the interface plugs into your computer is also important. Most modern devices use USB-C, which is fast, reliable, and the standard on newer computers. Some older or cheaper models might still use USB 2.0. Both work just fine for podcasting, but make sure the connection type matches your computer’s ports to avoid a last-minute scramble for an adapter.
Choosing the right audio interface for podcasting really boils down to these core features. If you prioritize clean preamps, the right number of inputs, and quality-of-life functions like direct monitoring, you’re setting yourself up for great sound and a frustration-free recording process.
Audio Interface vs USB Mic vs Digital Mixer for Your Podcast
Choosing the right audio hardware can feel like a massive decision. With so many options out there, how do you know what’s right for your podcast? Let's cut through the noise and compare the three main options to find the perfect fit for your show.
We can break it down into three camps: the plug-and-play simplicity of a USB mic, the superior quality and flexibility of an audio interface, and the total studio control of a digital mixer. Each has its place, and the best choice comes down to your specific goals, budget, and how much you want to get.
The USB Mic: Plug-and-Play Simplicity
A USB microphone is the most direct route to recording your voice. It’s an all-in-one piece of gear with everything it needs built right in, connecting straight to your computer's USB port. No fuss.
For many creators, this is the perfect starting point. With global podcast listeners hitting 464 million in 2023 and 62% of Americans over 12 having tuned in, the simple, accessible nature of USB mics lets new voices join the conversation without a huge upfront cost. You can explore more data about the professional audio industry's growth on WifiTalents.
- Pros: Very affordable, incredibly easy to set up (just plug it in), and perfect for solo podcasters just getting their feet wet.
- Cons: Sound quality won't match a professional XLR setup, recording more than one person is a nightmare, and there’s no real upgrade path.
- Ideal User: The new or hobbyist podcaster who records alone and values simplicity and budget above all else.
- Typical Cost: $50 - $200
The Audio Interface: The Professional Upgrade
An audio interface for podcasting is your next big step up. Think of it as the essential bridge that connects professional-grade XLR microphones to your computer, giving you a massive leap in audio quality and control.
An interface separates the critical audio components—the preamps and converters—from the mic itself. This allows for higher-quality, specialized parts that deliver cleaner sound with less background noise. It also unlocks the ability to record multiple people on separate tracks, which is a non-negotiable for professional editing.
"Every extra cable or piece of gear introduces another point of failure... Always look for reliable, time-tested gear." This advice gets to the heart of why an interface is so great. It adds just one key component that dramatically improves your quality without making your setup overly complex and prone to problems.
When to Choose an Audio Interface
- You want professional sound: You're done with beginner-level audio and ready to invest in the broadcast-quality sound your content deserves.
- You host in-person guests: A two-channel interface is the bare minimum for recording two people on separate, editable audio tracks.
- You want freedom and flexibility: You want to choose from the huge world of high-quality XLR microphones, not be locked into one device.
Here’s how it stacks up against a USB mic:
The Digital Mixer: The Command Center
A digital mixer is the command center for more complex podcasting. While it also connects mics to a computer like an interface, it gives you far more inputs and hands-on, real-time control over your sound.
With a mixer, you get physical faders and knobs to adjust levels, apply effects like EQ and compression, and route audio on the fly. Many, like the popular RØDECaster series, are purpose-built for podcasting with features like sound pads to trigger your intro music, ads, and sound effects during a live recording.
- Pros: Gives you maximum control, easily handles four or more mics, and is perfect for live-to-tape production with sound effects.
- Cons: Comes with a much steeper learning curve, can get expensive, and is definitely overkill for a simple one or two-person show.
- Ideal User: The podcaster hosting panel discussions, producing a live-style show, or anyone who wants granular, real-time control over every aspect of their audio.
- Typical Cost: $300 - $1,000+
Ultimately, the right hardware is the one that matches your production style. A USB mic is a fantastic start for a solo creator. But if you're serious about your sound and planning for growth, an audio interface for podcasting offers the best balance of quality, flexibility, and long-term value.
Blueprint for Common Podcasting Setups with an Audio Interface
Alright, knowing what all the knobs and inputs do is one thing. Actually plugging everything in and hitting record is where the magic happens. Let's walk through three common recording setups so you can see how this all comes together in the real world.
Think of these as blueprints for building a solid, high-quality recording rig.
This diagram shows you exactly where an audio interface fits into the bigger picture. It’s the central hub that connects your pro-level microphone to your computer or recorder.
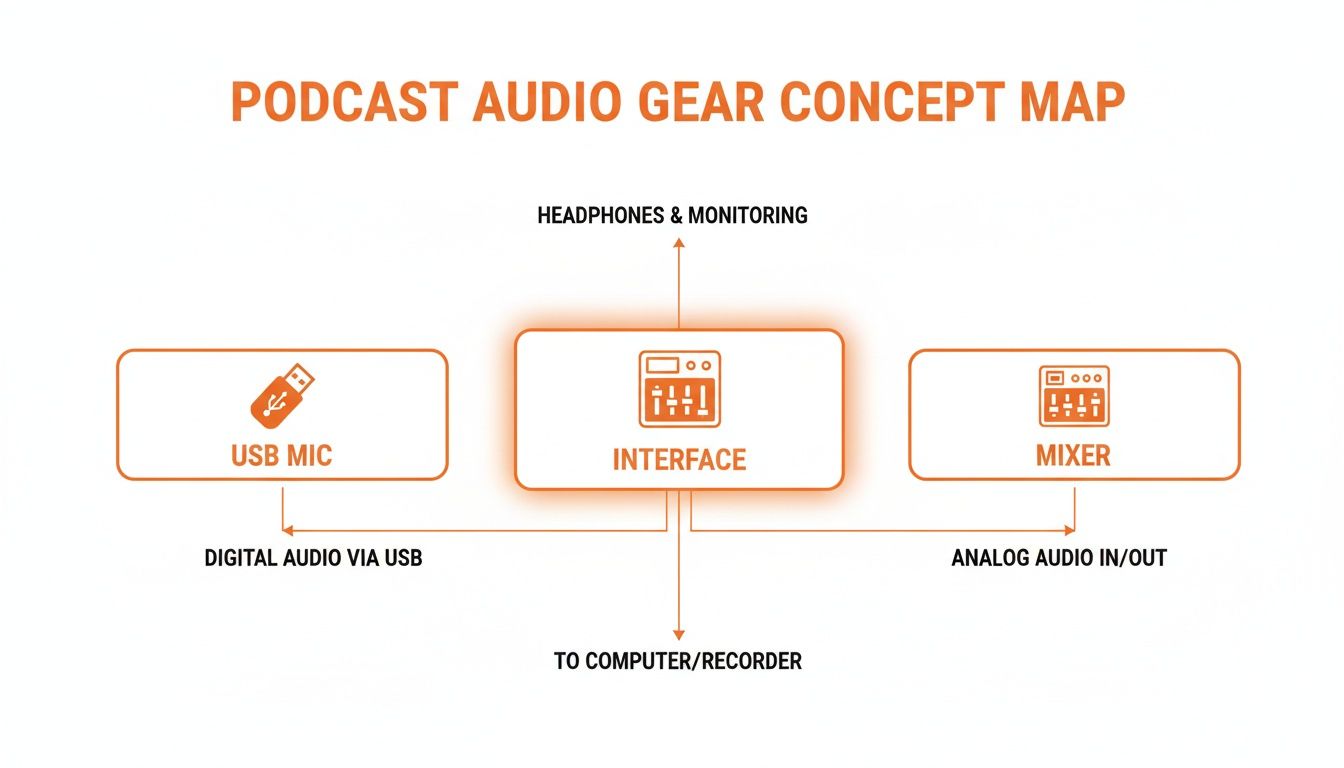
As you can see, the interface is the natural step up from a basic USB mic. It offers more flexibility and professional quality without the complexity of a full-blown audio mixer, making it the heart of a serious podcasting setup.
The Solo Podcaster Setup
This is the most common starting point for creators who are serious about their sound. If you’re a solo host, narrator, or recording voiceovers, this setup is your bread and butter. The goal is simple: capture a single voice with total clarity.
Your Gear List:
- A 1 or 2-Channel Audio Interface: A Focusrite Scarlett Solo or 2i2 is a perfect starting point.
- One XLR Microphone: Go with a solid dynamic mic like the Samson Q2U or a condenser like the Audio-Technica AT2020.
- One XLR Cable: This connects your mic to the interface.
- Wired Headphones: Essential for hearing yourself without any delay (zero-latency monitoring).
- A Computer with Recording Software: Free options like Audacity or GarageBand work great, as do professional tools like Adobe Audition.
How to Connect It:
- Use the included USB cable to connect the audio interface to your computer.
- Plug your microphone's XLR cable into Input 1 on the interface.
- Plug your headphones directly into the headphone jack on the interface itself.
- If you're using a condenser mic, make sure to press the +48V phantom power button.
- Open your recording software and set the audio interface as both the input and output device. This tells the software to record from your mic and play all audio back through your headphones.
The Two-Host Show Setup
This is the go-to setup for co-hosted shows or recording an in-person interview. The key here is using a two-channel audio interface for podcasting so you can record each person on their own separate audio track. This is non-negotiable for professional editing.
Why? If one host is much louder than the other, you can adjust their volume independently in post-production. Need to edit out a cough on one person’s track? You can do it without cutting off the other person mid-sentence.
Your Gear List:
- A 2-Channel Audio Interface: The Focusrite Scarlett 2i2 or PreSonus AudioBox USB 96 are industry standards.
- Two XLR Microphones: For a consistent sound, it’s best to use two of the same mic model.
- Two XLR Cables and Two Mic Stands.
- Wired Headphones for both people (a simple headphone splitter will do the trick).
How to Connect It:
- Connect the interface to your computer via USB.
- Plug the first mic into Input 1 and the second mic into Input 2.
- In your recording software, create two new mono audio tracks.
- Assign Track 1 to get its signal from Input 1, and assign Track 2 to get its signal from Input 2. This is the most important step for multitrack recording.
- Set your gain levels for each microphone individually, do a quick soundcheck, and you’re ready to record.
The Hybrid Interview Setup
What happens when your co-host or guest is remote? This hybrid setup is incredibly common and combines a local host with a remote participant. The trick is routing the audio correctly so you can record your own mic and your guest's audio on separate tracks.
This routing technique is often called a "mix-minus." It sounds intimidating, but it's really just about preventing your remote guest from hearing a distracting echo of their own voice. Most modern recording software can handle this easily.
Audio interfaces are in high demand everywhere, not just for podcasts. The Asia-Pacific region, for instance, now accounts for nearly 45% of the global demand for these devices, a testament to the boom in home studios worldwide. (Source: Future Market Insights)
Once you’ve nailed your recording, you’ll move on to editing and mixing. To get a head start on that, check out our guide on using a frequency EQ chart. Mastering these fundamental setups gives you a rock-solid foundation for producing professional-sounding audio for any podcast you can dream up.
Choosing the Right Audio Strategy for Your Business
Choosing the right audio setup is about much more than just picking out gear. It’s a strategic decision that needs to align perfectly with your business goals. Whether you should buy an audio interface for podcasting or hire a managed service really comes down to your objectives, your resources, and how much you value your time.
To make the right call, you need to get clear on a few key questions. This isn't just a technical choice—it's a business decision that will shape your content's quality, your ability to scale, and your ultimate return on investment.
Defining Your Primary Objective
First things first: what is this podcast actually for? The answer completely changes the game and dictates the level of production quality you need to hit.
- Thought Leadership: If you're an executive or founder using a podcast to build authority, your audio quality has to be flawless. Even a hint of an amateur setup can chip away at the credibility you’re trying to build. Pristine sound is non-negotiable, whether you get it with a great interface or a professional service.
- Lead Generation: For marketing teams running a branded show to drive leads, quality and consistency are everything. Your podcast is a direct reflection of your company, and subpar audio can make your entire brand look bad.
- Internal Communications: If the podcast is for internal training or boosting company culture, the audio standards can be a bit more forgiving. Here, the goal is clear communication, not necessarily broadcast-level production.
Once you clarify your primary goal, it's much easier to weigh the true costs and benefits of each path. This focus is key to understanding why podcasts can be so effective for business when they’re tied to specific outcomes.
Budget, Team, and Technical Skill
Next, you need a realistic look at your available resources. Your budget isn’t just the upfront price of equipment; it's also the hidden cost of time spent on training, setup, and ongoing management.
A common pitfall is underestimating the time commitment of in-house production. A solo creator passionate about audio might find joy in managing the tech, but for a busy marketing team, that time is often better spent on strategy and promotion.
Take an honest look at your team. Do they have the technical know-how and, more importantly, the bandwidth to handle recording, editing, and troubleshooting when things go wrong? If the answer is no, the steep learning curve of new hardware can lead to major delays and a lot of frustration.
The Final Verdict: Hardware vs. Managed Service
With those answers in hand, a clear path should start to take shape. Each option offers a totally different kind of value.
Choose an Audio Interface if:
- You are a solo creator or run a small team with a genuine passion for audio production.
- Your budget is tight, and you'd rather make a one-time investment in hardware.
- You have the time and technical curiosity to learn and manage your own recording setup.
Choose a Managed Service (like micDrop) if:
- You are a busy marketing team or executive who needs to focus on high-level strategy, not get bogged down in technical details.
- Your main goal is a polished, professional-sounding show without the operational headache.
- You value a higher ROI on your time and need consistently great output to protect and elevate your brand.
For any serious business, the choice is simple: your audio strategy has to support your goals as efficiently as possible. An audio interface is a fantastic tool, but for teams that need professional results without the hassle, a managed production service delivers far more value by letting you focus on what you do best.
Your Podcasting Audio Interface Questions, Answered
Alright, let's tackle some of the common questions that pop up when you're trying to choose the right audio interface for podcasting. We'll clear up the practical concerns to help you make a final decision you feel great about.
Can I Use a USB Mic and an Audio Interface Together?
This is a very common question, and the short answer is almost always no. Trying to mix and match is usually a recipe for technical disaster.
A USB mic has its own mini-interface built right in. When you plug it in alongside a separate, external interface for an XLR mic, your computer and recording software get confused. This clash often leads to driver conflicts, audio sync problems, and a whole lot of frustration.
Actionable Insight: If you have multiple hosts in different locations, and one uses a USB mic while another uses an XLR setup, this can work. The key is that each person is recording their audio locally on their own computer. The "no mixing" rule applies to a single computer trying to manage both types of inputs simultaneously.
How Many Channels Do I Really Need?
For the vast majority of podcasters, a two-channel interface is the perfect sweet spot. It gives you the power to record yourself and a guest on separate tracks, which is absolutely essential for professional-level editing and mixing later on.
If you're a strictly solo creator, a single channel will get the job done. But starting with two channels gives you crucial room to grow your show. If you're planning on hosting roundtable discussions with three or more people in the same room, you'll need to look at an interface or a mixer with at least four channels.
When it comes to audio gear, the law of diminishing returns is very real. A quality entry-level or mid-range interface will deliver excellent, professional-grade sound. Your microphone and recording environment will have a much bigger impact on your final audio than upgrading from a $200 interface to a $1,000 one.
Does a More Expensive Audio Interface Guarantee Better Sound?
Up to a point, yes. More expensive interfaces tend to have better preamps, which give you a cleaner, stronger signal with less background hiss, especially when you have to turn up the gain. You'll definitely notice an improvement over the most basic, entry-level models.
However, once you move into the mid-range and beyond, the differences in pure sound quality become much less dramatic, especially for spoken word. At that stage, your choice of microphone and the acoustic treatment of your recording space will play a much, much bigger role in how your final podcast sounds.
Ready to skip the hardware headaches and get broadcast-quality audio from day one? At micDrop, we offer a complete, end-to-end production service that lets you focus on creating great content while we handle the rest. Discover our podcast production packages and elevate your show.


