How to Set Up a Podcast Studio for Pro-Level Results
Think of your podcast studio as more than just a room with a microphone. It's the controlled environment where your brand's voice comes to life. Getting it right is about creating a dedicated production space that makes your content shine, from the acoustics to the final edit.
Your Studio Is Your Most Important Asset
In a world overflowing with content, your production quality is no longer a "nice-to-have"—it's a critical first impression. Listeners have endless options, and poor audio or video quality is the fastest way to get them to click away.
The barrier to entry for podcasting is virtually zero, which means audience expectations are higher than ever. This guide is a real-world roadmap to building a studio that delivers professional-grade results, moving past generic checklists to focus on what actually moves the needle.
Build Your Brand with Pro-Level Quality
Your studio is where your brand’s authority is built. Consistent, high-quality production tells your audience you respect their time and are serious about your message. It’s not just a technical setup; it’s the hub for your brand’s entire audio and video identity.
Here’s a look at what we’ll break down:
- Tame Your Room's Acoustics: Learn how to make almost any space sound great, often with little to no budget.
- Choose Gear That Grows With You: We'll help you select microphones, cameras, and lighting that fit your needs now but can scale up later.
- Build a Bulletproof Workflow: Develop a repeatable production process that saves hours and prevents technical meltdowns.
- Launch and Distribute Like a Pro: Get your finished show onto platforms like Spotify and YouTube where your ideal audience is waiting.
A well-treated room is far more important than expensive gear. A $100 mic in a great-sounding room will always beat a $1,000 mic in a space full of echo and noise.
Ultimately, investing in your studio is a direct investment in your brand's future. When you build on a foundation of quality, you create content that doesn’t just attract an audience—it keeps them coming back. That's the real key to long-term growth.
Mastering Your Space with Smart Acoustic Treatment
Before you ever think about a microphone, you need to think about your room. This is the single most overlooked part of building a studio, and honestly, it’s the most important.
A high-end mic in a bad-sounding room will always sound cheap and unprofessional. But even a budget mic can sound incredible in a space that’s been properly treated. Why? Because your microphone isn't just recording you—it's recording the entire room.
Hard, flat surfaces are the enemy of clean audio. Bare walls, big windows, and hardwood floors act like mirrors for sound, creating the echo and reverberation that makes recordings sound hollow, distant, and amateur.
Soundproofing vs. Sound Treatment
Let’s clear something up right away: soundproofing and sound treatment are not the same thing.
Soundproofing is about blocking outside noise from getting in. Think construction-level work like installing mass-loaded vinyl or double-pane windows. For most podcasters, it’s complete overkill and far too expensive.
Sound treatment, however, is about controlling the sound inside the room. The goal is to absorb or diffuse sound waves to kill echo and get a clean, crisp recording. This is where you should focus 100% of your energy.
Choosing and Treating Your Room
The best podcasting rooms are usually smaller and full of soft things. A walk-in closet packed with clothes? That’s a nearly perfect DIY vocal booth because all that fabric just soaks up sound.
If you don't have a spare closet, look for a room with:
- Carpet: Floors are a huge reflective surface. Carpet is your best friend.
- An Irregular Shape: A perfect square room creates "standing waves," which amplify certain frequencies and make your audio sound weird. Odd-shaped rooms naturally break up sound reflections.
- Few Windows: Glass is basically a sound mirror. If your room has windows, you’ll need to cover them up with heavy curtains or blankets when you record.
Actionable Insight: Don't go overboard and make your room sound completely "dead" or unnatural. You’re aiming for controlled, clear audio, not a sterile anechoic chamber. A little bit of natural room tone is fine.
Once you’ve picked your space, it’s time to start taming those reflections. You don't need a massive budget to get pro-level results.
Practical Acoustic Treatment Solutions
Your game plan is simple: add soft, sound-absorbing materials to break up any hard surfaces. A mix of DIY hacks and professional products works great.
DIY and Budget-Friendly Options:
- Heavy Blankets: Moving quilts or heavy comforters are amazing. Drape them on the walls or hang them from mic stands to absorb high and mid-range frequencies.
- Bookshelves: A bookshelf filled with different-sized books is a fantastic sound diffuser. It scatters sound waves instead of letting them bounce straight back at your mic.
- Rugs and Furniture: A thick area rug does wonders for floor reflections. A fabric couch or a few upholstered chairs will also help absorb sound.
Professional Acoustic Products:
- Acoustic Foam Panels: These are the classic black or grey panels you see in studios. Place them on the walls directly in front of and behind your recording position to catch the most direct reflections.
- Bass Traps: These are much thicker panels designed to fit in corners, which is where boomy low-frequency sounds love to build up. Taming the low end is a pro move that makes a massive difference in clarity. You can learn more about how different frequencies affect your audio in our detailed frequency EQ chart guide.
By getting your room right first, you guarantee that every piece of gear you buy will perform at its best. A little time spent on acoustic treatment pays huge dividends in your final sound quality.
Choosing the Right Gear for Your Goals and Budget
Once your room sounds good, it's time to pick the gear that will capture your voice and vision. It's easy to get lost in technical specs and endless reviews, but the real goal is simple: choose equipment that fits what you're trying to build, not just what's popular.
A huge mistake I see people make is overspending on complex gear that just creates more headaches. Your best friends here are simplicity and reliability. You want tools that disappear into the background so you can focus on creating an amazing show.
Let's break down your options, from basic setups to full-on professional studios.
To help you visualize the path from beginner to pro, here’s a look at how your gear investment might scale across different budget tiers.
Podcast Studio Gear Tiers (Audio & Video)
Remember, these are just starting points. The right gear for you is the one that meets your immediate needs while leaving a little room to grow.
Decoding the Audio Chain
Your "signal chain" is just the path sound takes from your mouth to your computer. The two main routes are USB and XLR. Getting this choice right is probably the most important gear decision you'll make.
USB Microphones: The Plug-and-Play Solution
A USB microphone is the definition of simplicity. It’s an all-in-one device with the mic, preamp, and digital converter all packed inside, connecting with a single USB cable.
- Best for: Solo hosts, beginners, or anyone who values a quick and easy setup.
- Pros: Dead simple to use. Plug it in and hit record.
- Cons: Not very flexible—you can't upgrade individual parts. Trying to record multiple USB mics into one computer is a technical nightmare. Avoid it.
XLR Microphones: The Professional Standard
An XLR microphone is the traditional, modular approach. The mic itself just captures sound. It sends that raw signal through a sturdy XLR cable to an audio interface, which then handles the conversion and sends it to your computer.
- Best for: Anyone planning to have co-hosts or guests, or if you just want the best possible audio quality and a setup that can grow with you.
- Pros: Far better sound quality and durability. You can upgrade your mic or interface separately. It’s the only reliable way to record multiple people in one room.
- Cons: More moving parts and a slightly higher initial learning curve.
Actionable Insight: If you're flying solo and want pure simplicity, a great USB mic is a perfect start. But if you have any ambition for guests or want a setup that will last for years, investing in an XLR mic and an audio interface is the smart play.
Dynamic vs. Condenser Mics
Both USB and XLR mics come in two main flavors: dynamic and condenser. The right one for you is all about your recording space.
- Dynamic Microphones (The Room-Rejector): These mics are built to be less sensitive. They excel at rejecting background noise and only pick up what's directly in front of them. This makes them perfect for rooms that aren't professionally treated. The legendary Shure SM7B is the classic example.
- Condenser Microphones (The Detail-Catcher): These are much more sensitive, capturing a rich, detailed sound. That's a double-edged sword: they sound absolutely brilliant in a great room but will pick up every single echo, computer fan, and passing car in a bad one.
For a deeper dive into specific models that fit every budget, you might be interested in our comprehensive guide to recommended microphones for podcasting.
Equipping Your Studio for Video
Let's be clear: video isn't an optional add-on anymore. For anyone serious about building a brand, a video podcast is non-negotiable.
According to a 2024 report by Edison Research, 31% of weekly podcast listeners in the U.S. now watch video podcasts, demonstrating a significant shift towards visual content. A visual component is now essential for discovery.
The good news? A high-quality video setup is more affordable than ever.
Cameras: From Smartphone to Mirrorless
Your camera choice really comes down to budget and how polished you want to look.
- High-End Smartphone: Don't sleep on your phone. A recent iPhone or Google Pixel shoots in 4K and can look fantastic with good lighting. It’s a perfect entry point.
- Pro Webcam: A dedicated webcam like the Logitech Brio 4K is a big jump from your laptop's built-in camera, offering much better color and clarity for a modest price.
- Mirrorless Camera: This is the gold standard for that professional, cinematic look with a blurry background (called bokeh). A camera like the Sony a6400 is a workhorse. Just make sure whatever you choose has a clean HDMI output, meaning it can send video to your computer without all the distracting on-screen data.
Lighting: The Secret to Great Video
I’ll say it again: good lighting is more important than an expensive camera. Bad lighting makes a $2,000 camera look cheap. The goal isn't just brightness; it's about creating shape and depth.
The industry-standard three-point lighting setup is foolproof.
- Key Light: Your main and brightest light, set at a 45-degree angle to one side. It lights up the majority of your face.
- Fill Light: A softer, dimmer light on the opposite side. Its only job is to soften the shadows created by the key light.
- Back Light: Placed behind you, this light hits your head and shoulders to separate you from the background. This is what creates that professional depth and stops you from looking like a 2D cutout.
Actionable Insight: You can start with a simple ring light, but a dedicated kit with softboxes, like the Elgato Key Light or Amaran P60x panels, will give you infinitely more control for a much more flattering result.
Developing an Efficient Production Workflow
Great gear is only half the battle. Without a rock-solid production process, even the most expensive studio setup will lead to chaos and burnout. Your workflow is the real engine of your show—it’s what turns an idea into a published episode, consistently and without friction.
This is the system that separates the pros from the creators who get lost in a mess of files, deadlines, and technical headaches. When your process is so dialed in that it becomes second nature, you free up all that mental energy to focus on what actually matters: creating killer content.
As you can see from the gear progression below, the tools often get more complex over time. But a streamlined workflow? That's non-negotiable at every single stage.
Let's break down how to build that efficient system.
The Pre-Production Foundation
Amazing episodes are made long before anyone hits the record button. Pre-production is where you lay the groundwork, and a little bit of planning here will save you hours of pain later.
Get started with a simple content calendar—a spreadsheet or a Trello board is perfect. For every episode you plan, map out the essentials:
- The Core Topic: What's the single most important thing you want your audience to walk away with?
- Key Talking Points: Use bullet points to list the main ideas or questions. This isn't a script; it's a roadmap to keep the conversation from veering off-course.
- Guest Management: If you have guests, this is your hub for their contact info, bio, and scheduling.
- Required Assets: Make a note of any sound effects, video clips, or research you'll need during the edit.
Think of this as the blueprint for your episode. It ensures every recording session is focused and has a clear purpose.
Nailing the Recording Session
Whether you're flying solo or connecting with a remote guest, the goal is always the same: capture the cleanest audio and video possible. The best way to do that is with a standardized checklist you run through every single time.
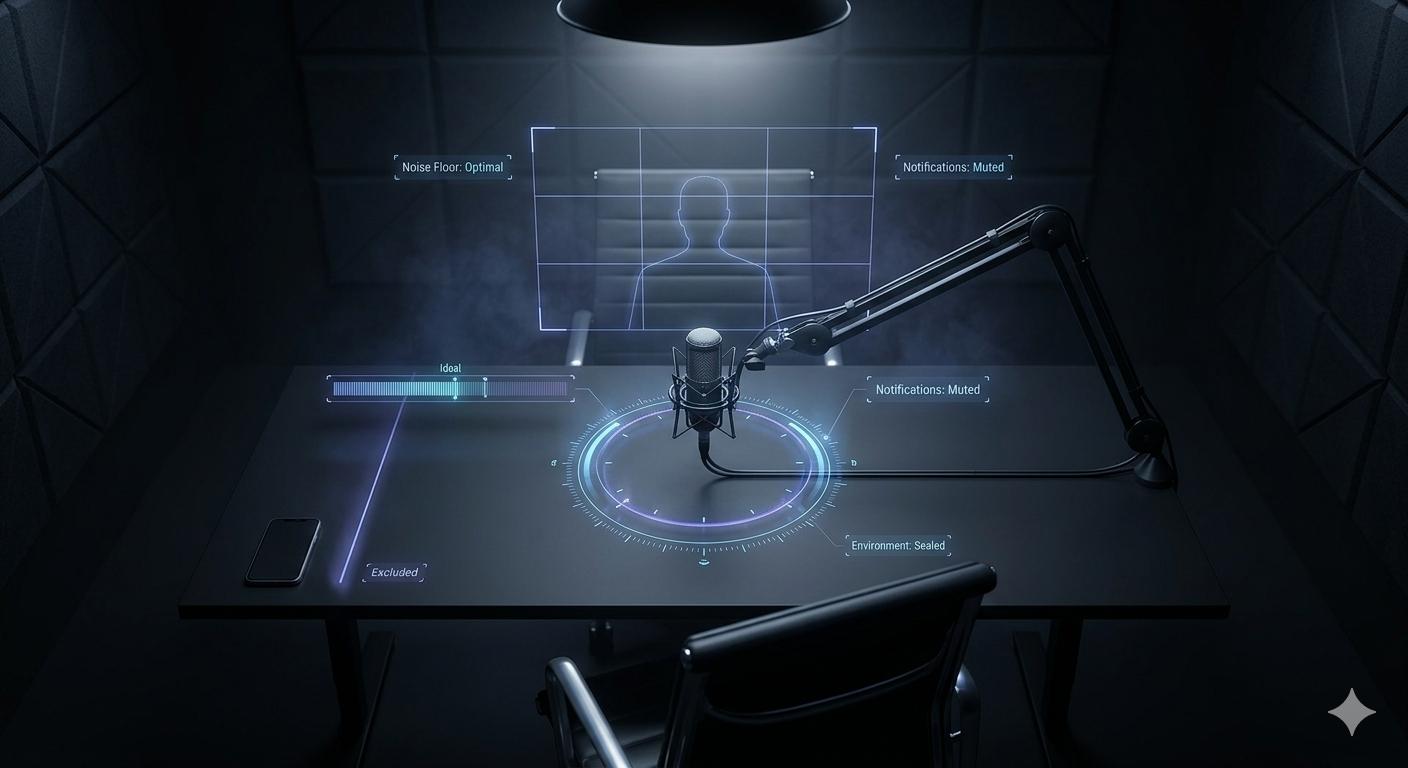
Your environment is everything. Before you record, always:
- Silence Your Space: Shut the door, close the windows, and put your phone on silent. Make sure to quit any computer apps that might send notifications.
- Check Your Levels: Do a quick soundcheck. You want your microphone input hitting the yellow range on your meter—not too quiet, and definitely not "peaking" into the red.
- Frame Your Shot: If you're on camera, double-check your angle, lighting, and what’s visible in your background.
When recording with remote guests, a pre-flight check is a must. Send them a simple one-sheet with tips for getting good audio, like wearing headphones and choosing a quiet room. Using a platform like Riverside.fm or Squadcast is a game-changer here, as they record separate, high-quality tracks for each person.
Actionable Insight: The most valuable workflow habit you can develop is file management. Immediately after a recording, label and organize your audio and video files into a dedicated project folder. A simple naming convention like "[Episode Number][Guest Name][Date]" will save you from a world of pain later.
Streamlining Post-Production
This is where your raw files get polished into a professional episode. It's also the most time-consuming part of the process, which makes an efficient workflow absolutely critical.
An inconsistent publishing schedule is a show-killer. Research shows a significant number of podcasts don't make it past their first few episodes, a phenomenon often called "podfading," due to burnout from inefficient workflows. With a global listener base projected to surpass 500 million in 2024 (source: Statista), having a workflow that supports a consistent publishing cadence is key to staying relevant.
Your post-production process should follow a clear, repeatable order:
- Assembly Edit: First, sync your audio and video tracks. Lay everything out on your timeline and trim the dead air at the beginning and end.
- Content Edit: Now, cut out the mistakes, long pauses, and anything that doesn't move the story forward. A tool like Descript is incredible for this, letting you edit audio and video just by editing a text transcript.
- Audio Sweetening: Apply basic processing to make the vocals pop. This usually includes noise reduction, equalization (EQ), and compression to ensure everything sounds clear and consistent. If you're just getting started, our guide can help you learn more about editing a podcast in Audacity.
- Video Polish: If you have video, this is where you add B-roll, graphics, or lower thirds. Do a quick color correction to make sure all camera angles match.
- Final Export: Render the final files—typically an MP3 for audio and an MP4 for video—at the correct specs for your podcast host and platforms like YouTube.
By turning these stages into a checklist, you transform a massive task into a series of manageable steps. This is how you get your show out on time, every single time.
Launching and Distributing Your Podcast for Maximum Reach
You’ve dialed in your studio, recorded a killer episode, and polished the edit. Now for the most important part: getting your show into people's ears.
A great podcast nobody hears is just a well-produced audio file collecting dust on your hard drive. Effective distribution isn't about just uploading an MP3 and hoping for the best—it's a deliberate strategy to make your show discoverable everywhere your ideal listeners hang out.
Your Pre-Launch Checklist
Before that first episode goes live, you need to get your "storefront" in order. These are the assets potential listeners see before they ever press play, and they absolutely need to make a strong first impression.
- Compelling Cover Art: This is your show's single most important visual. It needs to be a minimum of 1400x1400 pixels, though we recommend 3000x3000. It has to look fantastic both full-size and as a tiny thumbnail in a podcast app.
- A Catchy Show Title and Description: Your title has to be memorable. The description must immediately tell people who the show is for and what they'll get out of it. Weave in keywords your target audience is actually searching for.
- Professionally Written Show Notes: Think of these as SEO-friendly blog posts, not just episode summaries. Include key takeaways, timestamps, and links to any resources you mentioned. This is how you get discovered on Google.
- An Intro and Outro: A polished intro with music sets the tone instantly. Your outro needs a clear call to action, like telling listeners to subscribe or visit your website.
Your pre-launch assets define your brand's professionalism before anyone hears your voice. A sloppy description or pixelated cover art signals low-quality content, even if your audio is perfect.
Choosing a Host and Submitting to Directories
Here's something new podcasters often miss: you don't upload your show directly to places like Spotify or Apple Podcasts.
Instead, you upload your audio files to a dedicated podcast host. This service stores everything and generates your RSS feed—the unique link you'll submit to all the podcast directories.
When picking a host, look for:
- Reliable Analytics: You need to know your download numbers, where listeners are, and what apps they're using.
- Easy Publishing Workflow: The interface should be dead simple. You've got enough to worry about.
- Ample Storage: Don't let a restrictive plan cap your show's growth.
Once your first episode is uploaded (most directories require at least one), you’ll submit that RSS feed to all the major players: Apple Podcasts, Spotify, Google Podcasts, and more. The good news is this is usually a one-time setup.
A Modern Multi-Platform Distribution Strategy
Thinking of your podcast as "audio-only" in 2026 is leaving massive growth on the table. Your studio is a content engine, and the full-length episode is just the start. The real goal is to meet people on the platforms they already love.
Poor production quality is a top reason for listener drop-off. With the global listener base expected to hit 504.9 million by the end of 2024 (source: Statista), delivering pro quality from day one is your ticket to standing out.
A modern distribution workflow should look something like this:
- Publish the Full-Length Video to YouTube: Optimize your title, description, and tags with keywords. Create a custom thumbnail that grabs attention.
- Repurpose into Short-Form Clips: Pull the most powerful 15-60 second moments from your episode. This could be a surprising insight, a great story, or a strong opinion.
- Format for Vertical Video: Edit these clips into a 9:16 vertical format and burn in animated captions. This is essential for TikTok, Instagram Reels, and YouTube Shorts.
- Share Everywhere: Push these clips across all your social channels with a clear call to action driving people back to the full episode.
This strategy turns one piece of long-form content into a dozen marketing assets, dramatically increasing the odds of your show being discovered by a brand-new audience.
Common Questions About Setting Up a Podcast Studio
Building your first podcast studio always kicks up a few key questions. Get these right, and you'll save yourself a ton of time, money, and headaches down the road.
Let's cut through the noise and get straight to the answers you actually need.
How Much Space Do I Really Need for a Podcast Studio?
You'd be surprised how little space you need for pro-level sound. For a solo, audio-only show, a walk-in closet is practically a ready-made sound booth. All that soft clothing is a natural acoustic treatment, and smaller spaces are way easier (and cheaper) to manage.
But if you're planning a multi-person video podcast, you'll need room to maneuver. Aim for at least a 10x12 foot space. This gives you enough real estate for comfortable seating, cameras that aren't right in your face, and a proper lighting setup.
Should I Start with a USB or an XLR Microphone?
This is a crossroads every new podcaster faces, and it’s a big one. If you're on a tight budget and just want to hit record now, a quality USB mic like the Rode NT-USB+ is a fantastic plug-and-play choice. Simple and effective.
However, if you're serious about long-term quality and growth, start with an XLR microphone and an audio interface. It's a modular setup that offers far superior sound and durability. More importantly, it's the only practical way to scale up to multiple mics for guests or co-hosts later. Think of it as an investment in your show's future.
What’s the Single Most Common Mistake with a New Studio Setup?
Easy: ignoring the room. We see it all the time. Someone drops thousands on a world-class microphone and then puts it in a room with bare walls, high ceilings, and hardwood floors. It's a recipe for disaster.
This results in a recording filled with echo and reverb that sounds amateurish and is nearly impossible to fix in post-production. Spending even $100 on acoustic panels or strategically hanging heavy blankets will improve your sound more than a microphone upgrade ever could.
Do I Need to Launch with a Video Podcast?
Honestly? Yes. In today's media landscape, video is non-negotiable if you want to be discovered.
Platforms like YouTube and Spotify are heavily prioritizing video, giving you a massive advantage in reaching new audiences. Plus, video forges a much stronger connection with your listeners and gives you endless clips to repurpose for TikTok, Instagram Reels, and other social channels. Even if you start with a good webcam, capturing video from day one is a huge strategic win.
Feeling overwhelmed with the details of setting up and running a professional videocast? The team at micDrop provides an end-to-end production service that handles everything from remote recording and editing to distribution and repurposing. Let us manage the technical headaches so you can focus on your message. Learn more and book a call with us today.


