Editing A Podcast In Audacity: A Practical Guide
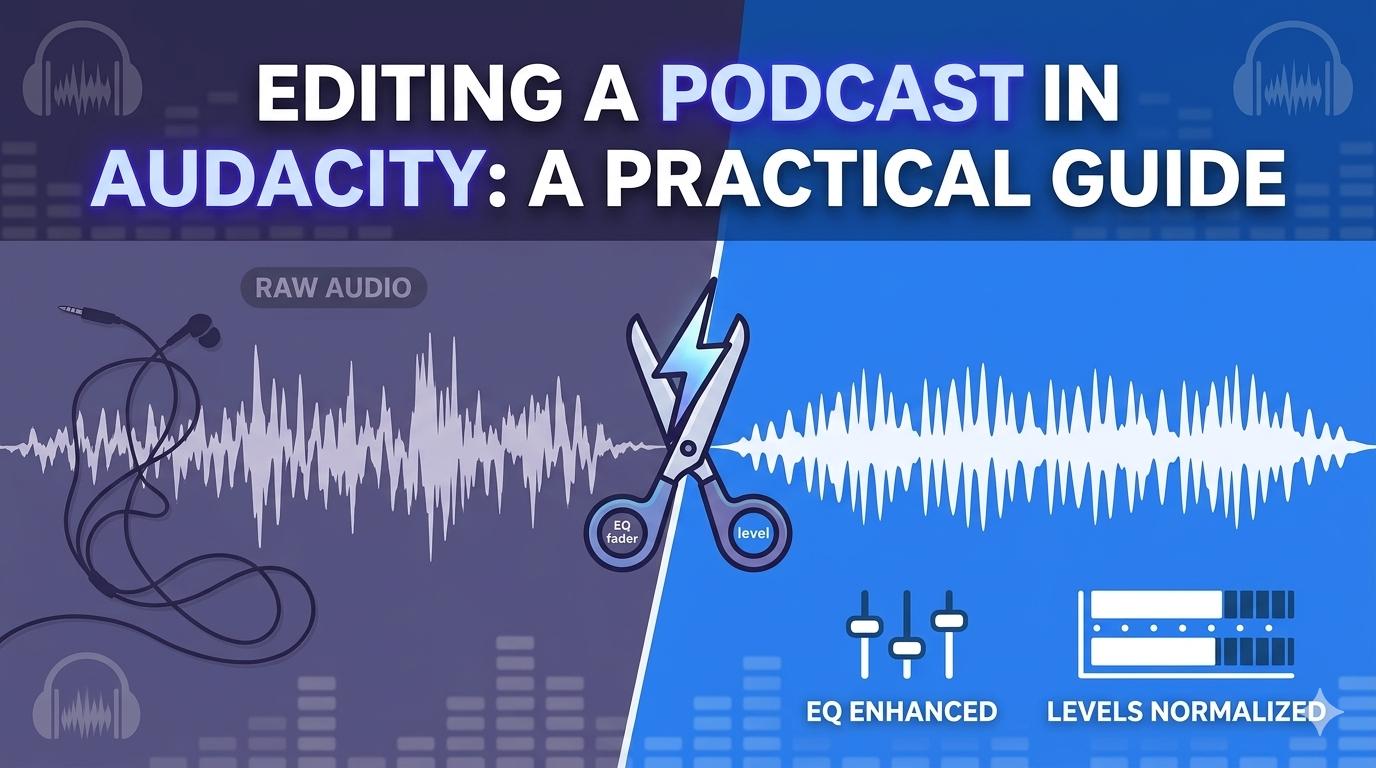
Editing a podcast in Audacity can feel like a daunting task, but it really boils down to a few key moves: getting your audio in, cleaning it up, and exporting the final MP3. With the right workflow, you can take raw, messy recordings and turn them into a polished episode, all with free software.
Setting Up Your Audacity Project For Success
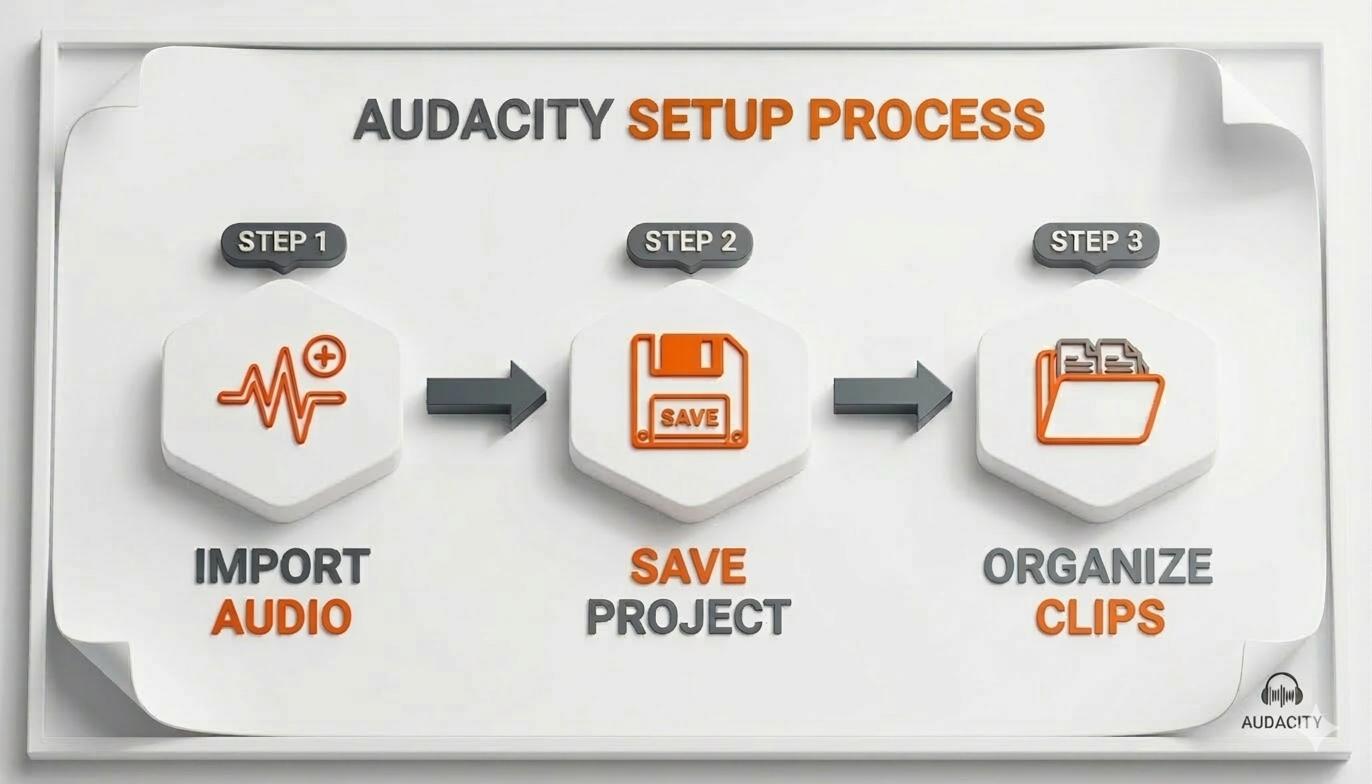
How you begin your project in Audacity is everything. A few smart steps at the start can save you from a world of frustration later. Think of it as laying a solid foundation—get this right, and the rest of the editing process becomes so much smoother.
First things first, you need to get your audio into the program. The easiest way is to just drag and drop your files right into the Audacity window. You can also go the old-school route with File > Import > Audio.
If you recorded a solo show, you’ll have a single file. For interviews, you’ll probably have two separate tracks—one for you, one for your guest. Audacity automatically places each file on its own track, which is exactly what you need for editing them independently.
Create Your Project File Immediately
Once your audio is loaded, do this one thing before anything else: save your project. Go to File > Save Project and give it a clear name like Episode-012-Final-Edit.aup3. This creates an .aup3 file, which is Audacity's native project format.
This isn't just about saving your audio. The .aup3 file saves everything:
- The exact arrangement of all your tracks
- Every single cut, fade, and effect you apply
- Your complete undo history
- All the labels and notes you add along the way
This simple action is your safety net. Working inside an Audacity Project file means you can always undo a mistake or revert to an earlier version. It protects you from losing hours of work if the program crashes.
Before you dive into the nitty-gritty of cutting ums and ahs, a quick pre-editing routine will set you up for a much faster workflow. Here's a checklist of what to do the moment you've imported your audio.
Audacity Pre-Editing Checklist
Following this checklist ensures your project is organized and stable before you invest hours into the creative work of editing.
Organize Tracks and Perform a First Listen
With your project saved, it’s time to tidy up. If you have multiple tracks, label them clearly. Double-click the default track name (like "Audio 01") and change it to something that makes sense—"Host," "Guest - Sarah," etc. This bit of housekeeping pays off big time when your timeline gets crowded.
Now, listen to the entire recording from start to finish. Don't stop to edit. Your only job is to spot the big-picture problems: major stumbles, long off-topic rants, or technical glitches like a dropped connection. Use Audacity's Label Track to drop markers at these points with short notes like "cut tangent" or "fix buzz."
Of course, the less you have to fix, the better. Starting with clean recordings dramatically cuts down your editing time. Using a quality audio interface for podcasting is one of the best ways to improve your raw sound and save yourself a ton of work in post-production.
Let's be real: editing takes time. A seasoned pro might spend one hour editing for every hour of audio. For beginners, that can easily stretch to 3 to 5 hours for a 60-minute episode. Nailing your initial project setup is the single best thing you can do to bring that number down.
Turning Raw Audio Into Polished Tracks
Alright, your project is set up. Now for the real work: cleaning up that raw audio. Every single recording has some grit to it—maybe it's the low hum of your computer, the air conditioner kicking on, or those little mouth clicks and pops that drive you crazy. Tackling these issues right away is the difference between an amateur-sounding show and a professional one.
Don't worry, this isn't as complicated as it sounds. We're going to use a few of Audacity’s most powerful tools in a specific order to methodically strip away the distractions and make your vocals shine.
This process gives you a solid foundation for every episode you edit.
Starting with a clean, organized project like this just makes the whole editing session go smoother.
Taming Background Noise
That constant, low-level hiss or hum in the background is a dead giveaway of an unedited podcast. It might come from your mic preamp or just the sound of the room. Audacity’s Noise Reduction effect is built for exactly this, but you have to use it with a light touch to avoid that weird, robotic sound.
The trick is to teach Audacity exactly what noise to remove.
- Find a quiet spot in your recording where no one is talking—ideally 3-5 seconds of just room tone. Highlight it.
- Head to
Effect > Noise Removal and Repair > Noise Reduction. - Click Get Noise Profile. Audacity now has a sonic fingerprint of the hiss you want to kill.
Now, select your entire audio track (a quick double-click on the track header does the job), go back into the Noise Reduction effect, and just click OK. The default settings are a decent starting point, but feel free to experiment.
Pro Tip: Less is more. Seriously. If you push noise reduction too hard, you'll suck the life right out of the voice. It's always better to leave a tiny bit of natural room sound than to get that dreaded "underwater" audio quality.
Hunting Down Clicks and Pops
Noise Reduction is great for constant sounds, but it’s useless against sudden, sharp noises like mouth clicks, lip smacks, or someone bumping their mic. For these, we need to get surgical with Audacity's Spectrogram view.
Click on your track’s name and switch the view from "Waveform" to "Spectrogram." This changes everything. Instead of just seeing volume, you're now seeing audio frequencies visualized over time.
- Waveform View: Shows you how loud the audio is.
- Spectrogram View: Shows you the pitch, with color intensity showing loudness.
In this view, clicks and pops stick out like a sore thumb—they look like bright vertical lines or streaks against the horizontal flow of speech. Just zoom in on one, highlight the tiny anomaly, and hit Ctrl+L (or Cmd+L on Mac) to silence it. The noise vanishes without leaving an awkward, dead-air gap.
Fixing Pacing and Uneven Volume
Pacing can make or break an episode. Long, awkward silences kill the energy, but you don't have to manually trim every single one. Audacity’s Effect > Truncate Silence tool can automatically shorten any pause that goes over a certain length, instantly tightening up your conversation.
On the flip side, what if someone trails off or mumbles a key phrase? Instead of asking for a re-take, just highlight that quiet part and use the Amplify effect. Audacity will suggest boosting it to a peak of 0 dB, but you’ll want to dial that back a bit to make it blend naturally with the audio around it.
Imagine your guest recorded their track in a loud coffee shop. You're dealing with a mix of steady background chatter and sudden clanks and bangs. Here’s the workflow:
- First, duplicate the track (
Ctrl+DorCmd+D) to create a backup. Never work on your only copy. - Switch to Spectrogram view and hunt down those sharp noises—a door slamming, a dish clattering—and silence them individually.
- Next, use Noise Reduction. Find a moment with just the café murmur to create your noise profile, then apply it to the whole track.
- Finally, go through and use the Amplify effect on any phrases that still sound too quiet, bringing them up to a clear, consistent level.
This layered approach is how you rescue difficult audio. It’s a powerful method that lets you deliver a clean, enjoyable listening experience, no matter where your audio was recorded.
Structuring Your Episode With Multitrack Editing
Once you’ve cleaned up your individual audio files, the real fun begins. This is where you move from technician to storyteller, piecing together the narrative of your episode. Multitrack editing is all about arranging your dialogue, music, and sound effects into a single, cohesive track that flows naturally.
Think of this as the architectural phase of your podcast edit. You're building the show's structure from the ground up, deciding what goes where and making sure every element pulls its weight.

Aligning Your Tracks With The Time Shift Tool
If you recorded with a remote guest, chances are your audio tracks won't line up perfectly. One person might have hit record a few seconds before the other. Before you start cutting anything, you have to get them in sync.
This is a job for the Time Shift Tool, which you can quickly access with the F5 shortcut. It’s the one on the toolbar that looks like a horizontal line with arrows on each end. Once you select it, you can click and drag an entire audio track left or right on the timeline.
To sync up, find a clear audio cue that’s present in both recordings—a shared laugh, a clap, or a specific word you both said. Zoom way in on that spike in the waveform and drag one track until the peaks align. Just like that, your conversation is perfectly synced.
The Time Shift Tool is also what you'll use to place your intro music, ad spots, and sound effects. Just import the audio file, and it'll pop up on a new track. Then, slide it into position wherever you need it.
Making Clean Cuts Across Multiple Tracks
At some point, you’ll definitely need to cut a section that spans across multiple tracks—maybe a tangent that went nowhere or a long, awkward pause. If you try to cut each track one by one, you’re almost guaranteed to knock them out of sync.
Instead, you can make one clean, synchronized cut across all tracks at the same time.
- Start by clicking and dragging your cursor over the section you want to remove. You'll see the highlighted area span across all your tracks.
- Now, use the Split Cut command (Ctrl+Alt+X on Windows or Cmd+Option+X on Mac). This removes the audio and instantly shifts everything to the right of the cut over, closing the gap.
This is the best way to tighten up a conversation without breaking the natural flow. It’s a lifesaver for cutting out off-topic chats or trimming down a long-winded answer.
A lot of beginners make the mistake of just hitting the "Delete" key, which leaves behind a dead-silent gap. Always use Split Cut to remove audio and keep your episode’s timing intact.
Using Label Tracks As Your Episode Roadmap
When you’re juggling interviews, ads, music, and multiple speakers, your timeline can get messy, fast. This is where Label Tracks come in. They act like a visual map for your project, letting you drop notes and reminders right on the timeline.
To create one, just go to Tracks > Add New > Label Track. Click anywhere on this new track and start typing. It's the perfect way to mark things like:
- Content Segments: "Intro," "Topic 1," "Guest Interview"
- Edit Points: "Remove cough here," "Shorten this story"
- Ad Spots: "Mid-roll ad break starts"
- Sound Cues: "Add transition music here"
For example, if you're producing a corporate training podcast, you could use labels to mark the introduction, the main lesson, a Q&A section, and the closing summary. This simple habit makes navigating your project so much easier and ensures you don't miss a beat.
Of course, a great structure needs great content. If you're brainstorming ideas for your next show, check out our guide on finding interesting podcast topics to make your segments even more compelling.
Mastering Your Podcast For A Professional Sound
This is where the magic happens. The final polish is what separates a decent recording from a professional, broadcast-quality episode. After you’ve cleaned up the audio and arranged your tracks, mastering is how you get that consistent, loud, and clear sound that listeners expect.
This step ensures your podcast sounds incredible whether someone’s listening in a car, on their laptop, or through a pair of high-end earbuds. We’ll walk through a simple, repeatable process using three core Audacity effects: Filter Curve EQ, Compressor, and Loudness Normalization.
Shaping Your Sound With The Filter Curve EQ
Equalization, or EQ, is all about balancing the frequencies in your mix. The goal here isn't to perform audio surgery but to gently sculpt the sound for better clarity and presence. In Audacity, the Filter Curve EQ gives you the most visual and intuitive control.
Think of it this way: too much low-end makes your audio sound boomy and muddy, while too little high-end makes it sound dull. The Filter Curve lets you tweak this balance perfectly.
For most vocal-driven podcasts, a couple of simple moves can make a huge impact:
- A Gentle Low-Cut (High-Pass Filter): This carves out all the useless low-frequency rumble that microphones pick up—things like desk vibrations, room tone, and deep plosives. It cleans up the mud without touching the natural warmth of the human voice.
- A Subtle Presence Boost: Adding a small bump in the upper-mid frequencies is the secret to making vocals pop. It brings out articulation and helps voices cut through any background music you might be using.
To do this, just select your audio (Ctrl+A or Cmd+A) and navigate to Effect > EQ and Filters > Filter Curve EQ. You can start with built-in presets like "Low roll-off for speech" or "Treble boost," which you’ll find under the "Manage" button. If you want to dive deeper, you can learn about specific frequencies in this guide on using an EQ chart.
Taming Dynamics With The Compressor
Ever found yourself constantly reaching for the volume knob while listening to a podcast? One minute the host is whispering, and the next, they’re laughing at full volume. The Compressor is the tool that fixes this.
A compressor works by automatically turning down the loudest parts of your audio, which then allows you to raise the overall volume of the entire track without it distorting. The result is a much smoother and more consistent listening experience.
The Compressor is your audience's best friend. It ensures they can listen comfortably without ever needing to touch the volume dial, which is a key factor in keeping them engaged from start to finish.
To get started, head to Effect > Volume and Compression > Compressor. The default settings in Audacity are a really solid starting point. I often find a threshold of around -12 dB with a ratio between 2:1 and 3:1 provides a nice, gentle compression that evens things out without sounding squashed or unnatural.
While Audacity is a phenomenal free tool and a popular choice for beginners, its limitations can show as your needs evolve. For a B2B videocast founder, the Compressor's lack of precision compared to paid software can be a sticking point. Although it works for the 23% of podcasts that are 40-60 minutes long, 40% of those episodes risk listener drop-offs from subtle but noticeable sound inconsistencies, as detailed in this 2026 industry report on podcast editing.
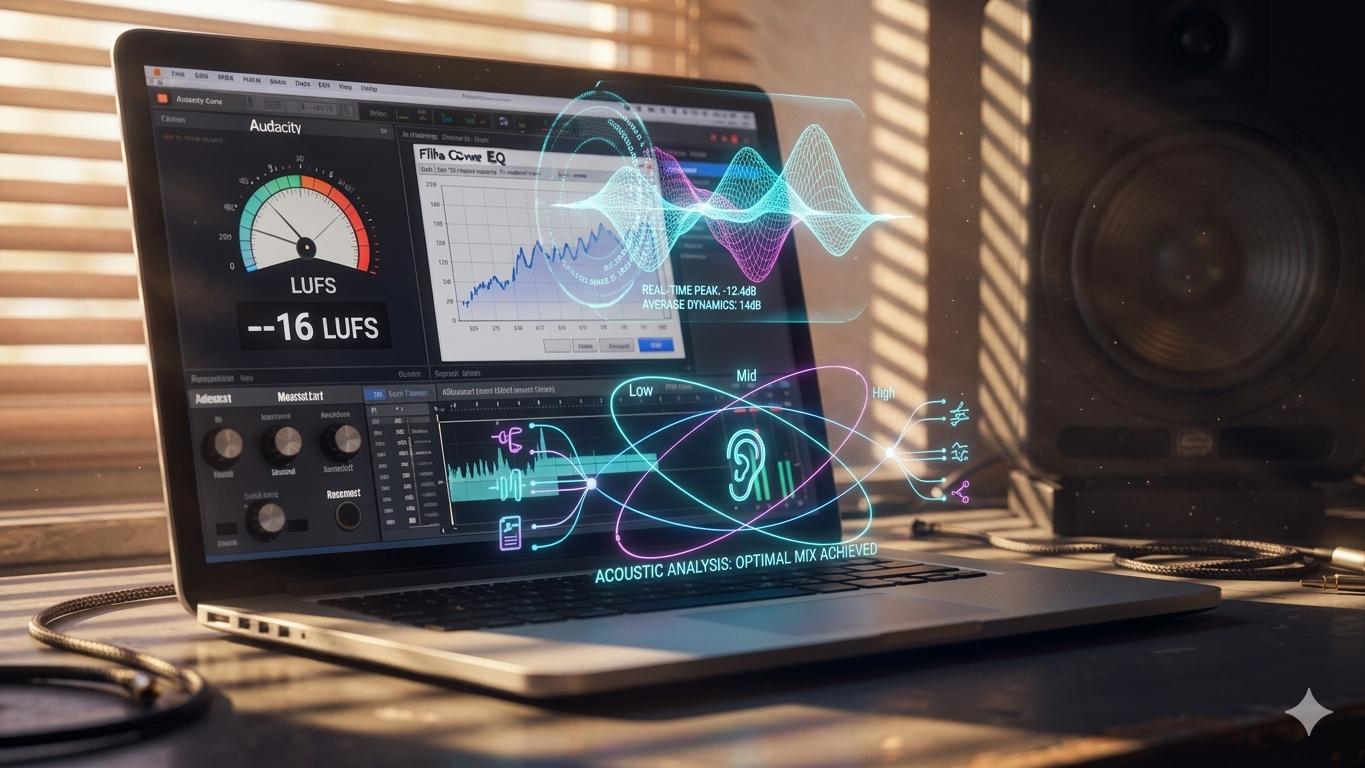
Achieving The Final Loudness Standard
The last step in the mastering chain is setting your final loudness to match industry standards. This ensures your show has a similar volume to other podcasts on major platforms like Spotify and Apple Podcasts, so listeners don't have to adjust their volume when your episode comes on. The target for most stereo podcasts is -16 LUFS (Loudness Units Full Scale).
First, we need to add a safety net. Audacity’s Limiter will catch any stray audio peaks that made it past the compressor and could cause distortion.
- Go to
Effect > Volume and Compression > Limiter. - Set the Type to Hard Limit.
- Set the Limit to -1.0 dB.
Think of this as a ceiling your audio can't break through.
Finally, we apply Loudness Normalization. Go to Effect > Volume and Compression > Loudness Normalization. Set the Perceived Loudness to -16 LUFS and hit "Apply." Audacity will analyze your entire mix and adjust the overall gain to hit that target precisely.
This simple, three-step chain—EQ, Compression, and Loudness Normalization—is a powerful and repeatable workflow. Follow these steps, and you’ll be able to give your carefully edited tracks the final, professional polish they deserve.
Finalizing And Exporting For All Platforms
You’ve done the heavy lifting—the cuts are clean, the audio is polished, and your episode is sounding sharp. Now for the final mile: packaging your masterpiece so it sounds perfect everywhere, from Spotify to Apple Podcasts.
Before you hit export, do one last quality check. This is non-negotiable. Grab a pair of standard headphones—the kind your listeners might use—and listen to the entire episode from start to finish. Don't touch the editor. Just listen. You'll be amazed at the stray clicks, awkward pauses, or volume dips you catch with fresh ears.
Choosing The Right Export Settings
Confident the episode is ready? It's time to export the final file you’ll upload to your podcast host. Audacity gives you plenty of options, but for podcasts, the industry standard is MP3. It’s the perfect blend of solid sound quality and a small file size, which is critical for listeners streaming on cellular data.
Go to File > Export > Export as MP3. This brings up a dialog box with a few crucial settings to get right.
- Bit Rate Mode: Always, always choose Constant (CBR). Variable bit rate might save a tiny bit of space, but it can cause playback issues on older devices. Constant bit rate is your guarantee that the file will play smoothly for everyone.
- Quality (Bit Rate): For a stereo podcast (music, multiple speakers), 128 kbps is the sweet spot. If you have a simple mono recording of just your voice, you can go down to 96 kbps or even 64 kbps to shrink the file size without a noticeable drop in vocal clarity.
Getting these settings right is a small technical step that prevents big headaches. It ensures universal compatibility and a seamless listening experience for your audience, no matter what app or device they use.
Embedding Essential Metadata
After you click "Save," a new window pops up: "Edit Metadata Tags." Do not skip this! This is the data baked directly into your MP3 file that tells podcast apps what the episode is all about.
Filling this out makes your show look professional from the moment it’s downloaded. It's a small detail that shows you care.
Here’s what you need to fill in for every episode:
You can also add your show's cover art right here. It’s another great way to reinforce your brand before the file even hits your hosting platform.
Speeding Up Your Workflow With Macros
If you’re producing episodes weekly, you'll find yourself repeating the same finishing sequence: run the Limiter, apply Loudness Normalization, and Export. This is where Audacity’s Macros feature becomes a lifesaver. It lets you automate that entire chain with a single click.
To set one up, navigate to Tools > Macro Manager. Here, you can build a new command that applies your mastering effects and exports the file with your chosen settings. For instance, a "Finalize & Export" Macro could run your Limiter, normalize the audio to -16 LUFS, and then export the file as a 128 kbps MP3.
Once it's built, you just run the Macro after your final edit. It turns a tedious, multi-step process into a one-click finale—an absolute game-changer for producers on a tight schedule.
Common Questions About Editing A Podcast In Audacity
Diving into Audacity for the first time? It's a fantastic, free tool, but it definitely has its quirks. Let’s tackle some of the most common questions we hear from producers just getting their start.
Can I Edit A Video Podcast In Audacity?
Short answer: No. Audacity is a pure digital audio workstation (DAW). It's built for sound and sound alone—it won't even open a video file. This is a crucial point for anyone creating video podcasts for YouTube.
The professional workflow involves separating your audio and video. You’ll first perfect your audio in Audacity—running noise reduction, balancing your speakers, and mastering the final track.
Once you have that polished audio file, you’ll import it into a video editor like DaVinci Resolve or Adobe Premiere Pro alongside your raw video footage. From there, you just need to sync the new audio track to your video before making your final cuts.
What Is The Difference Between Destructive And Non-Destructive Editing?
Understanding this concept is absolutely fundamental to using Audacity. The vast majority of edits you’ll make—applying EQ, Compression, or Noise Reduction—are destructive.
What that means is once you apply an effect and save, the change is baked into the audio forever. You can’t just toggle it on and off later.
Pro Tip: Always, always duplicate your original track before making big changes. Just hit Ctrl+D (or Cmd+D on a Mac). This creates an identical backup that you can mute. If you mess up an edit, you can simply delete the botched track and go right back to your pristine original.
This one habit is your safety net. It prevents irreversible mistakes that could otherwise ruin a recording.
How Do I Make My Podcast Loud Enough For Spotify?
Platforms like Spotify and Apple Podcasts want every show to sound consistent, so they use loudness standards. The industry target for most stereo podcasts is -16 LUFS (Loudness Units relative to Full Scale). If your show is too quiet, they'll boost it (often poorly). If it's too loud, they'll crush it.
Here’s how to hit that -16 LUFS target perfectly in Audacity after you’ve finished all your other edits:
- First, run the Limiter effect set to -1.0 dB. This acts as a ceiling, catching any stray peaks before they can cause distortion.
- Next, select all your audio.
- Go to
Effect > Volume and Compression > Loudness Normalization. - Set "Perceived loudness" to -16 LUFS and click "Apply."
This two-step process ensures your final audio is not only loud enough for every platform but also clean and free of distortion.
Feeling like the technical side of Audacity is slowing you down? micDrop provides end-to-end podcast production, handling everything from remote recording to professional audio and video editing. We deliver a polished, ready-to-publish show so you can focus on creating great content.
Elevate your brand's story with a high-quality video podcast. Learn more at https://www.micdrop.cc.


